How to Bake This Seriously Easy Rustic Savory Uber Crusty Olive/Jalapeno/Garlic Bread

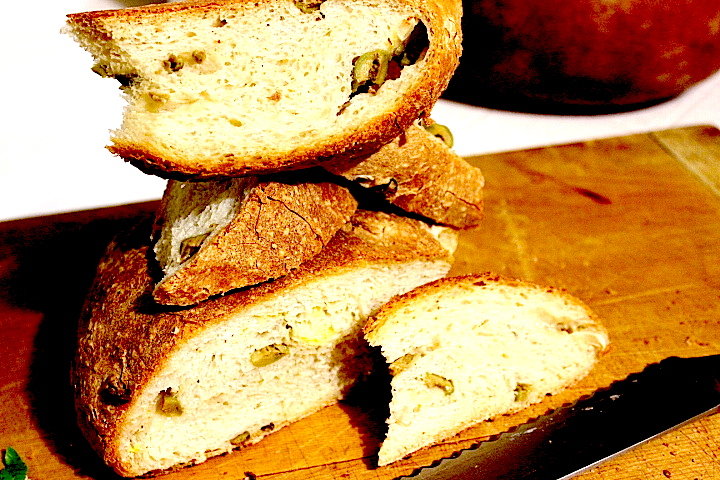
This is bread heaven.

Crusty golden on the outside, chewy texture studded with olives, jalpenos, and garlic on the inside.

OK, listen to me. There is NO reason why you can’t recreate this masterpiece of textures and mouthwatering goodness.

If you think baking bread is beyond your skill set, think again.

Can you toss a few ingredients in a bowl, go away for a couple of hours, and throw a few olives and other things on top of the dough and mold it into a round shape?

Can you?

Of course you can.https://enchantedseashells.files.wordpress.com/2015/03/olivejalapenogarlicbread1.jpg


It’s so easy — not rocket science — and I guarantee success.

homemade bread recipe

Seriously Easy Rustic Savory Olive/Jalapeno/Garlic Bread

3 cups all purpose flour
1 package regular active yeast
1 1/4 cups warm water
1 1/2 teaspoons salt
1 tablespoon olive oil just for the rising bowl)

1 cup rough chopped olives (pitted)
2 jalapeños
3 cloves garlic

1. You can either sauté the jalapeños and garlic for a few minutes or leave them raw; it’s your choice. I used pickled lalapenos and garlic ‘cos I had them in the pantry.

2. In a large bowl, combine flour, yeast, salt, water. If you have a mixer with a dough hook, mix until it comes together in a wet ball. Add a bit more flour if it looks too wet, but you don’t want an overly dry dough.

3. If you’re doing it all by hand, old-school style, use a wooden spoon and put some muscle into it.

4. When it comes together, flour a cutting board and knead for a bit; this is a rustic bread so it doesn’t have to be perfect.

5. Oil a bowl with the reserved olive oil, place the dough in bowl, cover with a plastic bag, and set aside in a warm place to rise for a couple of hours. It helps to blanket the bowl with a towel, too.

6. After you can see the dough has doubled in size, turn the dough onto a floured wooden board. With your hands, roughly press the dough into a circle.

7. Add half the olives/jalapenos/garlic.

8. Fold the dough in half and gently press again to a rough circle.

9. Add the rest of the ingredients and form the dough into a ball shape.

Not so different than Play-Doh, right?

10. Line a baking sheet with parchment paper.

11. Dust the baking sheet with a teaspoon or so of cornmeal or flour.

12. Let rise again for about thirty minutes.

13. Toward the end of this second rising, preheat oven to 400 degrees.

14. Using a sharp knife, cut an X-shaped slit across the top of the dough.

15. Bake about forty minutes until the top is golden brown.

16. What I like to do toward the end of baking time is to take the bread off the baking pan and place directly on the rack to bake for another five-seven minutes. This ensures a completely even crunchy crust.

17. Take out of the oven, place on cooling rack.

It’s very important not to cut into it too soon! I know it’s hard to wait, but sometimes it’s a good idea.

Serve with homemade lentil soup and a fresh garden salad; this is truly bread heaven.
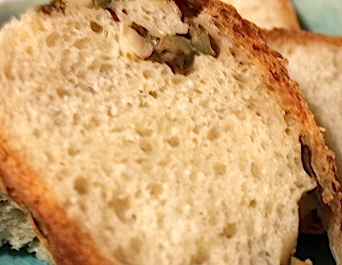
olivebread3

Enjoy!

I’d like to hear from you if you try it. I taught tugboat man how and he didn’t think it was too difficult.

Yummy Black Bean Brownies and Lentil Cookies

These recipes were originally requested by my good friend at TheFurFiles.

My Angel Boy is coming tomorrow, yay!!!! (That’s what I call my son, in case you’re a new reader/follower.)

Now all is right in my little corner of the universe which means that today I’m baking. A lot.

Lentil Cookies, Persimmon Bread (recipe coming soon), Snickerdoodles, and Corn Bread to go with Veggie Chili for tonight’s dinner. Oh, and a Pumpkin Pie, cos Angel Boy requested it.

These are not vegan ‘cos of the eggs and butter (in lentil cookies) but I think it’d be simple to create a version without them.

Black Bean Brownies

Directions

Preheat the oven to 350 degrees F. Grease a 9 by 9-inch square baking pan. In a blender, puree the beans with the oil. Add the eggs, cocoa, sugar, coffee, and vanilla. Melt half the chocolate chips and add to the blender. Blend on medium-high until smooth. In a small bowl, whisk together the flour, baking powder, and salt. Add to the blender and pulse until just incorporated. Stir in the remaining chocolate. Pour into the prepared pan. Bake until the surface looks somewhat matte around the edges and still a bit shiny in the middle, about 20 minutes. Let cool at least 15 minutes before cutting and removing from the pan. My family thinks they taste better the longer you let them sit, so the beany texture dissipates.

Lentil Cookies (Alton Brown‘s version)

  • 9 1/2 ounces whole-wheat pastry flour, approximately 2 cups*
  • 1 teaspoon baking powder
  • 1 teaspoon salt
  • 1 1/2 teaspoons ground cinnamon
  • 1/2 teaspoon ground allspice
  • 8 ounces sugar, approximately 1 cup (1/2 white, 1/2 brown)
  • 4 ounces unsalted butter, room temperature, approximately 1/2 cup***Sometimes I use half oil, half butter, or all oil. Depends on my mood and my pantry.
  • 1 egg
  • 2 teaspoons vanilla extract
  • 1 1/2 cups lentil puree, recipe follows
  • 3 1/2 ounces rolled oats, approximately 1 cup
  • 4 ounces dried fruit, approximately 1 cup
  • 2 1/4 ounces unsweetened dried shredded coconut, approximately 1 cup

Preheat the oven to 375 degrees F.

In a medium bowl, combine the flour, baking powder, salt, cinnamon and allspice. In the bowl of a stand-mixer with a whisk attachment, cream together the sugar and butter on medium speed. Add the egg and mix until just incorporated. Add the vanilla and lentil puree and mix until combined. Add the flour mixture and blend on low speed until just combined. Remove the bowl from the mixer and stir in the oats, dried fruit and coconut. Form the dough into balls about 2 teaspoons in size and place on a baking sheet with parchment paper, leaving about 1-inch of room in between. Bake for 15 to 17 minutes.

Lentil Puree:

  • 4 ounces lentils, approximately 2/3 cup, picked over and rinsed
  • 2 cups water

In a small pot over medium heat, combine the lentils and the water. Bring to a simmer, cover, and simmer for 30 to 40 minutes, or until lentils are tender. Remove from the heat and puree. If using immediately, let cool. The puree may be stored in the refrigerator for 3 to 4 days or in the freezer for 2 to 3 months. Yield: 1 1/2 cups lentil puree.

What’s FUDGE Got To Do With It?

musical-note-2-clip-art_435934
Sing it loud and proud to the tune of Tina Turner‘s What’s Love Got To Do With It“.

Probably nothing, if you must know, but when we were in Sacramento a couple weeks ago, we stopped for a brief tourist-y couple of hours in Old Sacramento where we purchased fudge from a candy store, and it wasn’t very good.

You know how when your mouth is watering and you’re anticipating the feel and texture of good fudge doing its slow and sultry dissolve, filling your senses with the magnificence of rich flavorful chocolate??….Well, it didn’t happen, so I knew it was time for me to make a batch.

I’ve been making fudge since I was about six years old — always with my mom and her tried and true recipe, which is Hershey’s tried and true recipe.

All fudge is judged by that recipe and that taste.

There is NONE better.

In fact, I would double dog dare you to a “fudge-off” and surpass the delicious fudge creaminess of this fudge. I know a lot of recipes call for corn syrup but this one does not and I think it’s better.

Join me on my fudge-y journey while I channel my inner Nigella Lawson.

Starting out… Don’t let it bubble over!!!

Fudge3

When the candy thermometer hits 234 degrees, that’s the time to take it off the heat. Add butter and vanilla. Let it cool down to 110 degrees. Don’t stir too soon!!!

Fudge4

When it reaches 110 degrees, beat it until it starts to lose its glossy color. It takes about 15 or 20 minutes, so you’ll get a work out.
Fudge1

Pour into 9×9 pan. Wait for it to set up firm and lovely and oh so creamy.

Fudge5  Yummy, yummy, yummy!

Fudge6

Don’t you wish you were here??
musical-note-2-clip-art_435934“What’s FUDGE but a sweet old fashioned notion?”musical-note-2-clip-art_435934

Fudge6

Hershey‘s Fudge
This is the recipe. Follow it EXACTLY. It’s perfect just the way it is.

  • 3 cups sugar
  • 2/3 cup HERSHEY’S Cocoa or HERSHEY’S SPECIAL DARK Cocoa
  • 1/8 teaspoon salt
  • 1-1/2 cups milk (I used nonfat ‘cos that’s what we have on hand.)
  • 1/4 cup(1/2 stick) butter
  • 1 teaspoon vanilla extract

1. Line 8-or 9-inch square pan with foil, extending foil over edges of pan. Butter foil.

2. Mix sugar, cocoa and salt in heavy 4-quart saucepan; stir in milk. Cook over medium heat, stirring constantly, until mixture comes to full rolling boil. Boil, without stirring, until mixture reaches 234°F on candy thermometer or until small amount of mixture dropped into very cold water, forms a soft ball which flattens when removed from water. (Bulb of candy thermometer should not rest on bottom of saucepan.)

3. Remove from heat. Add butter and vanilla. DO NOT STIR. Cool at room temperature to 110°F (lukewarm). Beat with wooden spoon until fudge thickens and just begins to lose some of its gloss. Quickly spread in prepared pan; cool completely. Cut into squares. Store in tightly covered container at room temperature. About 36 pieces or 1-3/4 pounds.

NOTE: For best results, do not double this recipe. This is one of our most requested recipes, but also one of our most difficult. The directions must be followed exactly. Beat too little and the fudge is too soft. Beat too long and it becomes hard and sugary.