What Is Unalome?

fullsizeoutput_dd5

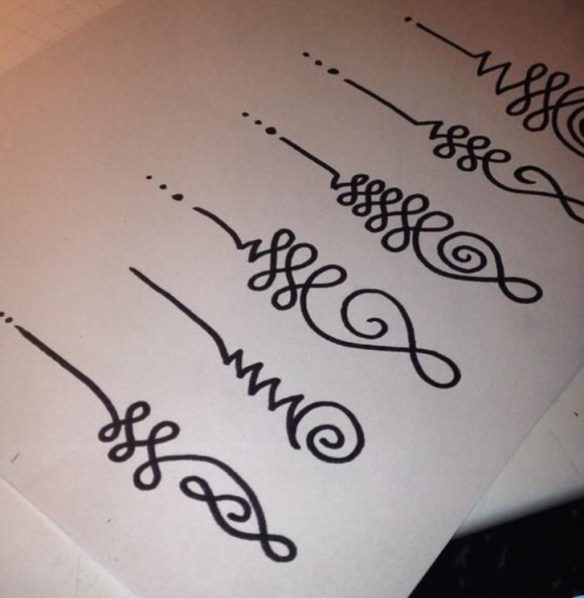
I don’t have any tattoos; it’s not really my thing, but if I ever did get one, it might this design.

In the Buddhist culture, the unalome symbol represents the path to enlightenment. The spirals are meant to symbolize the twists and turns in life and the straight lines represent the moment one reaches enlightenment or peace and harmony. The dots at the end of the symbol represent death.

Unalomes have been depicted for thousands of years in Buddhist art (the stone spires outside of the temple Wat Bang Phra), but the place that they’re most commonly seen today is as skin art. I read some people think it’s disrespectful or an act of cultural appropriation to replicate this design, so that’s something to consider.

I’ve edited this post because I forgot something! Although I was/am a drone mom (more intense than a helicopter mom lol), when my son was in high school, he apparently was able to elude me for a couple hours and came home with a crude, homemade tattoo. Notwithstanding the fact that he was a 4.8 student, he didn’t think he might be a candidate for blood poisoning (silly boy) and I was SO angry with him. That was pretty much his only rebellious episode, so he didn’t get in too much trouble. His tattoo? “SK8”, because he was a skateboarder, and it was right where you could see it every day, exactly where a watch would be. For years, I teased him with “What time is it?” And he’d take a look at his wrist and respond, “Time to skate.”

When it was time to be a grown adult, get his PhD and have a real job, he got tired of wearing long sleeved shirts and had it lasered off. It took twenty years, but he finally admitted it was not his finest decision.

If you have a tattoo, what is it?


You heard right…I did say Vegan Lentil Kale Cookies

BF607BA9-C66F-4599-B127-A6B2A94341DF
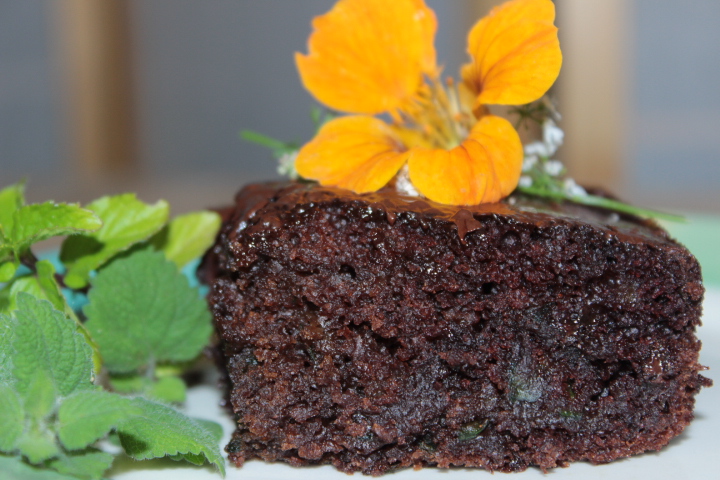
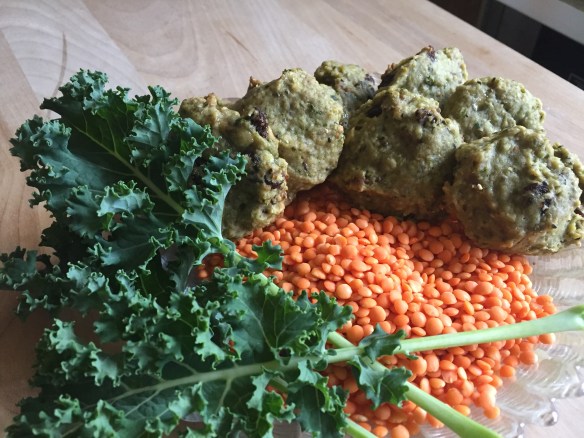
And they are DELICIOUS, much to even my surprise, haha.

I was playing around in the kitchen this morning and thought I’d challenge myself to experiment baking with only the ingredients I have in my pantry.

There’s not much food here, but that’s a sad story for another day. (I can pinpoint the exact date and time that my love for cooking and baking was destroyed like an atom bomb.)

Anyway…

I thought these cookies were going to be making the short journey from oven to compost BUT they surprised me, so I thought I should share the recipe before I forget. If you try them, let me know what you think.

Vegan Lentil Kale Cookies

Lentils (cooked)-one cup
Kale-1/2 cup raw (freshly picked from the garden.)
Banana-one, mashed
Oil-1/3 cup
1/3 cup agave plus 2 tablespoons maple syrup
Chia seeds-2 tablespoons
Raisins-1/2 cup
Oats-1//2 cup (oat flour, I make my own, so easy. 1/2 cup oats in the blender or Bullet or food processor, takes just a few seconds.)
Whole wheat flour-1 cup
Baking powder-1/2 teaspoon
Pinch salt
Cinnamon-1 teaspoon
Vanilla-1 teaspoon

If you don’t already have some leftover cooked lentils like I did, cook 1 cup of lentils with 2 cups of water until soft, about 20-30 minutes or until all the water is absorbed.)
Let cool.

Place one cup cooked lentils in bowl.
Combine the kale and the oil in a blender/Bullet/food processor. Blend until a smooth slurry.
Add to lentils.
Add agave/maple syrup, vanilla, raisins, chia, and all other ingredients.
Mix until flours are well incorporated.
Let chill in refrigerator a few minutes until the oven is heated to 375 degrees.

Using a teaspoon, place about two inches apart on baking sheet. Flatten with a fork coated in flour so it won’t stick.

Bake for about 17 minutes until bottom is golden brown and the top is firm.
Let cool on wire rack.
YUM!

***Options: Of course if your pantry is more well stocked than mine, you can def add grated apples, coconut, and other dried fruit and nuts.


Super Moist #Vegan Chocolate Cake With Amaretto Coffee Frosting

Since I now focus most of my baking to please Angel Boy 2.0 (the new and improved version), this was the winner of all the chocolate cakes I ever created, so I thought I’d share it again for those of you who do still currently turn on the oven and combine ingredients to conjure up lovely confections (not confessions).

At 15 months, AB 2.0 can’t have chocolate; for now he’ll have to be happy with sugarless teething biscuits and kale smoothies. 


No eggs and no dairy, yet this cake is super moist, fluffy, and fudge-tastic — with a hint of French roast coffee and almond-y Amaretto.

vegancakeTEXT

I was inspired by a recipe I found in my mom’s old cookbook — as always, I transformed it into my own version.

I know I use Amaretto a lot, but I ran out of vanilla and it’s a great flavor enhancer with chocolate and coffee.

Moist #Vegan Chocolate Cake With Amaretto Coffee Frosting

  • 1/2 tsp.  salt
  • 1 tsp. baking soda
  • 1 cup white sugar
  • 1/3 cup cocoa (unsweetened)
  • 1 1/4 cups flour (all-purpose)
  • 1 tsp. white vinegar
  • 1 tsp. pure vanilla extract (or Amaretto or Grand Marnier)
  • 5 Tbsp. vegetable oil
  • 1 cup cold coffee or water (coffee is better with chocolate) or you could always use soy/almond/cashew/coconut milk.

Directions

Preheat oven to 350 degrees F.

1. Mix the first five dry ingredients in a bowl.
2. Make three shallow depressions in the dry ingredients.
3. Pour vinegar in one, vanilla/amaretto in the other, and vegetable oil in the third.
4. Pour coffee/water over all.
5. Mix well until smooth.

Grease a nine-inch pan. Bake on middle rack of oven for approximately twenty-five to thirty-five minutes.  Check with toothpick to make sure it comes out clean. Don’t over bake or it’ll dry out. Cool and frost.vegancake4

Amaretto Coffee Frosting
Three tablespoons softened vegan butter substitute (I use Earth Balance)
Three or four tablespoons cocoa
1 1/2 cups powdered sugar
Amaretto or Grand Marnier or vanilla
Cold coffee

In a medium bowl, sift sugar and cocoa. Blend with vegan butter. Add 2 teaspoons Amaretto or other flavoring, and 3 tablespoons cold coffee, Blend until desired consistency. If too dry, add more coffee or Amaretto. If too wet, add more powdered sugar.
Frost cake and dust with sifted cocoa.

vegancake3

Easy Peasy Refrigerator Pickles #MeatlessMonday

picklestextI spent the day harvesting cucumbers and trying to figure out a way to preserve them.

Freezing definitely doesn’t work for cucumbers, but everyone loves my homemade pickles, so that’s what I’ll do.

There’s a real sense of satisfaction in seeing the jars lined up on the shelf — a connection to the simpler times of harvest and preservation — no stores needed, just garden bounty and the proper ingredients.

pickles3

I pickled the cucumbers, dug up some carrots, and thought I’d get super creative and TRY pickling kale because there’s just so much of it.

Use the same brine for the carrots and kale; the only change is the addition of a lot more garlic to the kale.pickles4

Easy Peasy Refrigerator Pickles 
5 medium cucumbers
1 tablespoon pickling salt, sea salt, or kosher salt (but not iodized table salt)
1 cup cider vinegar or white vinegar
1 cup water
1 head dill or small bunch dill leaves
2 cloves garlic (optional)
3 black peppercorns (optional)
or one tablespoon pickling spices

Prepare the jar(s) by running through the dishwasher or washing it in very hot soapy water and letting it air dry. Any glass jar with a lid will do; the wider the opening, the easier.

For the crunchiest pickles, select firm, dark-green pickling cucumbers that have not started to ripen to white or yellow. Cut them into spears, slices, or chunks (left whole, they will take a long time to pickle in the fridge).

I read somewhere (can’t remember where) that the ends need to be cut off or it’ll create a mushy pickle.

Place the dill in the bottom of your jar, peel and crush the garlic cloves (if using), and drop that in along with the peppercorns (if using), then put in the cut cucumber.

Mix the salt, vinegar, and water in a separate container, stirring until the salt is dissolved, then pour it over the cucumbers, filling the jar right to the top.

If you’re in a hurry to enjoy your delicious pickles, heat the vinegar, water, and salt to a boil before pouring it over the cucumbers. Pop on the lid and put the jar in the fridge.

For kale, make sure it’s super clean with no dirt or sand lurking anywhere, ‘cos no one wants to eat gritty greens!

Shred as you would cabbage for slaw.

I actually mixed collard greens with the kale.

Place a few garlic cloves in the bottom of the jar(s) along with the pickling spices and dill.

Pack tightly into the jar(s) and pour vinegar mixture all the way to the top.pickles1Pickled Kale

pickles2I’ll let you know how the kale tastes after a few days of relaxing in the brine spa.

Do you pickle or can? How do you preserve your garden’s harvest?

Scrumptious Vegan Dark Chocolate Zucchini Cake

Dark Chocolate Vegan Cake www.enchantedseashells.comWe have a  bounty of zucchini here at the Casa de Enchanted Seashell garden, and the dilemma becomes what the heck does one do with all of this summer squash?

I made a few loaves of zucchini bread because they freeze well.

I’ll pickle a few jars like I’ve done with cucumbers and then I got the brilliant idea to add shredded zucchini to my favorite chocolate cake to boost the nutritional value and keep it super moist, not that it lasts more than a day or two, ‘cos it’s the best chocolate cake EVER, vegan or not.

Best of all, the zucchini magically disappears during baking, so if you have children who are recalcitrant and don’t like veggies (how is that even possible?) this is a great way to TRICK them, although I don’t really approve of deceit as a parenting technique.

Son and DIL are coming down for a brief visit so that’s the perfect excuse reason to experiment PLUS they’re bringing a friend that Angel Boy was in graduate school with at Yale (bad sentence structure, I know), so it’s just like the “old days” when the house was filled with kids for me to stuff with food.

I old-school shredded the zucchini…

zucchinicake

All dry ingredients go into the mixing bowl.

zucchinicake1 Add the liquids…

zucchinicake2 And the zucchini. So simple, now beat for a couple of minutes to incorporate all the goodness.

zucchinicake3 When it’s out of the oven and still hot, place about 1/2 cup of vegan chocolate chips on top. When they melt…zucchinicake4 Take an offset spatula and spread to make a delicious and easy topping.zucchinicake6

See how shiny?zucchinicake7

It’s always nice to garnish with garden blooms. I plucked a nasturtium, mint, and lemon verbena.

It’s as yummy as it is GORGEOUS!

zucchinicake8

Dark Chocolate and Zucchini Vegan Cake

  • 1/2 tsp.  salt
  • 1 tsp. baking soda
  • 1 cup white sugar
  • 1/3 cup cocoa (unsweetened)
  • 1 cup shredded zucchini (squeeze out any excess liquid)
  • 1 1/2 cups flour (all-purpose, I use King Arthur, not because they pay me, but because it’s U.S. grown and an employee-owned company)
  • 1 tsp. white vinegar
  • 1 tsp. pure vanilla extract (or Amaretto or Grand Marnier)
  • 5 Tbsp. vegetable oil
  • 1 cup cold coffee or water (coffee is better with chocolate) or you could always use soy/almond/cashew/coconut milk.

Directions

Preheat oven to 350 degrees F.

1. Mix the first five dry ingredients in a bowl.
2. Make three shallow depressions in the dry ingredients.
3. Pour vinegar in one, vanilla in the other, vegetable oil and zucchini in the third.
4. Pour coffee/water over all.
5. Mix well until smooth.

Grease a nine-inch pan. Bake on middle rack of oven for approximately twenty-five to thirty-five minutes.  Check with toothpick to make sure it comes out clean. Don’t over bake or it’ll dry out. Cool and frost.

Keep It Simple With Brown Rice, Kale, and Tofu #MeatlessMonday

Over the last couple of years, I’ve seen a huge increase in the numbers of vegan blogs and vegan recipes (YAY!) but it seems that they’re getting more and more elaborate, as if it’s a sort of competition to create the most difficult-to-prepare meals.

I’m sending a more simple back-to-basics message.

If we agree that one of the reasons for not eating meat advocates for a cruelty-free life to protect animals from a hellish existence on earth, we need to also communicate that it doesn’t always have to be a herculean task to do the right thing.

I’ve been a veg since 1970 and in those 40+ years have seen a lot of people make a similar decision to go meat-free and then, for one reason or another, fall off the wagon.

One of the reasons I’ve heard time and time again is that it’s “too hard”.

I disagree.

Some of my most enjoyable and satisfying meals are the most simple.

Here’s an example of a basic, easy-to-prepare dinner.

Start with my can’t fail One Dish Brown Rice recipe.

It’s PERFECT every time.

1. Add one cup brown rice to a 9×9 glass baking dish.

2. Pour over the rice not quite two cups water plus one teaspoon olive oil.

3. Lay gently on top of the rice one-inch chunks of tofu.

4. Sprinkle pepper, chopped fresh herbs, freshly ground salt (if you must).

5. Cover tightly with aluminum foil. Bake at 375 degrees for about 45 minutes.

6. While the rice is baking, I picked a bunch of kale from the garden, cut into bite-size pieces, and steamed it.

7. To serve, sprinkle rice with low-sodium soy sauce, slice an organic tomato and garnish with cilantro or parsley (we grow cilantro year-round in the Casa de Enchanted Seashells garden.

A chilled chardonnay will dance a tango on your palate and complement the earthy rice, tofu, and kale combo.

Simple. Delicious. 

Nourish + Brighten! Loquat + Emergen-C #DIY Facial Mask

Loquat Emergen-C facial maskHow about a smoothie for your face?

This zesty homemade mask will freshen, nourish, and brighten up your winter-weary skin.

When my tugboat man is home (and when son/DIL are here) we enjoy “Family Facial Day”.

To be honest, “enjoy” is a relative term, the boys describe it as “endure”.

Of course hub and son don’t participate without a lot of whining, but DIL and I can be fairly persuasive. There’s nothing funnier than using a scrub on a couple of men who’re complaining about how much it hurts like they’re being abused. Men are such babies even though they’re always pleased with the results.

For those of you that had to endure skin-drying heating all winter along with harsh snowy weather, this is a perfect mask to nourish and brighten.

In SoCal, we’ve had our hottest March ever recorded — coupled with low humidity, my own face was looking as parched as the Anza Borrego Desert.

Probably because it’s been so unseasonably warm, the first of our loquats are ripe.

As soon as enough of them are ready, I’ll make jam with our harvest (RECIPE HERE) but I thought I’d experiment creating a mask.

Loquats are full of vitamin-A — looking around our garden, I picked a lime for vitamin-C and a few leaves of white sage for cleansing and purifying. (If you live in an area where loquats don’t grow, you could use apricots or even peaches.)

loquatfacial1

I tossed it all in the blender with bananas, avocado, and a squeeze of agave nectar.

Then I spied the secret weapon: Emergen- C!

With all the C and other vitamins and minerals, it’s like a healthy smoothie for your face. This is the one I used, but any flavor will work. Hopefully, it won’t tint your skin pink; it didn’t do that to me.

loquatfacial3loquatfacial2


I didn’t invent the Emergen-C facial; my research revealed others have discovered its benefits, too.

Facial Tips:

  • Start with a really clean face so the facial will be better absorbed.
  • Only make enough for one or two facials — as the ingredients are so fresh, they need to be used right away.

Nourish + Brighten Facial Mask Ingredients:

Loquats: Three small, remove seeds.
Lime Juice: Squeeze half lime
Banana: One half.
Avocado: One half.
Emergen-C: Half or whole packet.
Agave or honey: A teaspoon or two, just to make it sticky enough so the facial doesn’t slide off your face.
Sage: A few leaves (optional if you don’t grow it in your own garden.)
Try adding a few shakes of ground turmeric or cinnamon, too.

  • Toss it all in a blender until smooth.
  • Pat on your face, neck, décolleté (don’t forget that!).
  • Leave on for about fifteen minutes while you recline with a towel behind your head and neck to catch any spills.
  • Rinse off thoroughly and moisturize.
  • Admire the glow!
  • Refrigerate any leftover mask.

It’s been a couple of days since I did it; I’m very pleased with the results, and will absolutely make this again when the rest of the family is here.

It’s so much fun to torture the guys!


Super Moist #Vegan Chocolate Cake With Amaretto Coffee Frosting

Since I now focus most of my baking  to please Angel Boy 2.0 (the new and improved version), this was the winner of all the chocolate cakes I ever created, so I thought I’d share it again for those of you who do still currently turn on the oven and combine ingredients to conjure up lovely confections (not confessions). At 15 months, AB 2.0 can’t have chocolate; for now he’ll have to be happy with sugarless teething biscuits and kale smoothies. 


No eggs and no dairy, yet this cake is super moist, fluffy, and fudge-tastic — with a hint of French roast coffee and almond-y Amaretto.vegancakeTEXT

I was inspired by a recipe I found in my mom’s old cookbook — as always, I transformed it into my own version.

I know I use Amaretto a lot, but I ran out of vanilla and it’s a great flavor enhancer with chocolate and coffee.

Moist #Vegan Chocolate Cake With Amaretto Coffee Frosting

  • 1/2 tsp.  salt
  • 1 tsp. baking soda
  • 1 cup white sugar
  • 1/3 cup cocoa (unsweetened)
  • 1 1/4 cups flour (all-purpose)
  • 1 tsp. white vinegar
  • 1 tsp. pure vanilla extract (or Amaretto or Grand Marnier)
  • 5 Tbsp. vegetable oil
  • 1 cup cold coffee or water (coffee is better with chocolate) or you could always use soy/almond/cashew/coconut milk.

Directions

Preheat oven to 350 degrees F.

1. Mix the first five dry ingredients in a bowl.
2. Make three shallow depressions in the dry ingredients.
3. Pour vinegar in one, vanilla/amaretto in the other, and vegetable oil in the third.
4. Pour coffee/water over all.
5. Mix well until smooth.

Grease a nine-inch pan. Bake on middle rack of oven for approximately twenty-five to thirty-five minutes.  Check with toothpick to make sure it comes out clean. Don’t over bake or it’ll dry out. Cool and frost.vegancake4

Amaretto Coffee Frosting
Three tablespoons softened vegan butter substitute (I use Earth Balance)
Three or four tablespoons cocoa
1 1/2 cups powdered sugar
Amaretto or Grand Marnier or vanilla
Cold coffee

In a medium bowl, sift sugar and cocoa. Blend with vegan butter. Add 2 teaspoons Amaretto or other flavoring, and 3 tablespoons cold coffee, Blend until desired consistency. If too dry, add more coffee or Amaretto. If too wet, add more powdered sugar.
Frost cake and dust with sifted cocoa.

vegancake3

How to Bake This Seriously Easy Rustic Savory Uber Crusty Olive/Jalapeno/Garlic Bread

This is bread heaven.

Crusty golden on the outside, chewy texture studded with olives, jalpenos, and garlic on the inside.

OK, listen to me. There is NO reason why you can’t recreate this masterpiece of textures and mouthwatering goodness.

If you think baking bread is beyond your skill set, think again.

Can you toss a few ingredients in a bowl, go away for a couple of hours, and throw a few olives and other things on top of the dough and mold it into a round shape?

Can you?

Of course you can.https://enchantedseashells.com/wp-content/uploads/2015/03/olivejalapenogarlicbread1.jpg

It’s so easy — not rocket science — and I guarantee success.

homemade bread recipe

Seriously Easy Rustic Savory Olive/Jalapeno/Garlic Bread

3 cups all purpose flour
1 package regular active yeast
1 1/4 cups warm water
1 1/2 teaspoons salt
1 tablespoon olive oil just for the rising bowl)

1 cup rough chopped olives (pitted)
2 jalapeños
3 cloves garlic

1. You can either sauté the jalapeños and garlic for a few minutes or leave them raw; it’s your choice. I used pickled jalapenos and garlic ‘cos I had them in the pantry.

2. In a large bowl, combine flour, yeast, salt, water. If you have a mixer with a dough hook, mix until it comes together in a wet ball. Add a bit more flour if it looks too wet, but you don’t want an overly dry dough.

3. If you’re doing it all by hand, old-school style, use a wooden spoon and put some muscle into it.

4. When it comes together, flour a cutting board and knead for a bit; this is a rustic bread so it doesn’t have to be perfect.

5. Oil a bowl with the reserved olive oil, place the dough in bowl, cover with a plastic bag, and set aside in a warm place to rise for a couple of hours. It helps to blanket the bowl with a towel, too.

6. After you can see the dough has doubled in size, turn the dough onto a floured wooden board. With your hands, roughly press the dough into a circle.

7. Add half the olives/jalapenos/garlic.

8. Fold the dough in half and gently press again to a rough circle.

9. Add the rest of the ingredients and form the dough into a ball shape.

Not so different than Play-Doh, right?

10. Line a baking sheet with parchment paper.

11. Dust the baking sheet with a teaspoon or so of cornmeal or flour.

12. Let rise again for about thirty minutes.

13. Toward the end of this second rising, preheat oven to 400 degrees.

14. Using a sharp knife, cut an X-shaped slit across the top of the dough.

15. Bake about forty minutes until the top is golden brown.

16. What I like to do toward the end of baking time is to take the bread off the baking pan and place directly on the rack to bake for another five-seven minutes. This ensures a completely even crunchy crust.

17. Take out of the oven, place on cooling rack.

It’s very important not to cut into it too soon! I know it’s hard to wait, but sometimes it’s a good idea.

Serve with homemade lentil soup and a fresh garden salad; this is truly bread heaven.olivebread3

Enjoy!

Best 100% Whole Wheat Bread Recipe

Easy+Spectacular 100% Whole Wheat Bread

Without a doubt, THIS is the absolute BEST 100% whole wheat bread I’ve ever made.

I have a Kitchen Aid stand mixer, but you can use a hand mixer with the bread hook attachment. And if you don’t have that, you can go totally old school with a big bowl, a wooden spoon, and get a great upper body work out. Sometimes I still make bread that way just to prove to myself that I can.

Easy + Spectacular Whole Wheat Bread 

One cup warm water (not too hot)
1/4 cup orange juice (I used fresh squeezed)
One packet yeast
1/4 cup agave syrup (honey or molasses works, too)
1/4 cup vegetable oil
3 1/2 cups 100% whole wheat flour, approximately.
One teaspoon sea salt

Mix water and orange juice plus agave in large bowl. Sprinkle yeast on top; stir.

Cover with a cloth for a few minutes to allow the yeast to bloom.

All at once, add, oil, THREE cups of flour, and salt.

With paddle attachment, mix for about three or four minutes. Switch over to the bread hook attachment and knead approximately 8-10 minutes, adding the last 1/2 (or so) cup flour a little at a time.

When the dough begins to form a ball and pull away from the sides, turn it out onto a floured board and knead by hand until it’s soft and pliable, not sticky.

Oil a bowl for rising, add dough, cover with plastic, and then cover with dishcloth. Let rise until it doubles in size. I like to find a non-drafty location like the oven or on top of a dryer.

When it’s doubled (about two hours), punch down gently and let sit on floured cutting board for a few minutes. Here’s my quick technique for shaping bread for a loaf pan.

Pat the dough into a rectangle — you don’t need to measure or be all OCD about it…

Fold in half. Starting at the folded side, roll into a cigar shape, pinch the edges closed, and pop into a loaf pan.

Try not to use too much extra flour ‘cos that will make it tough and dry.

Let it rise again for about thirty minutes or until the bread rises above the rim of the pan. Toward the end of the rising time, preheat the oven to 400 degrees.

Bake about thirty-forty minutes, checking to make sure it doesn’t become too brown. You can always cover the top with a piece of aluminum foil the last five minutes or so of baking.

When it’s done, let it cool for five minutes in the pan, then turn the bread onto a rack to finish cooling. Tap the bottom of the loaf with your fingers to see if it gives off a hollow sound. Then you know for sure it’s done.

Does this sound very tedious and time consuming? Just do it a couple of times, and it’ll be come second nature to you.

Homemade bread is SO much superior to store bought, chemical and preservative-laden bread. The texture of this bread is finely grained and tender; almost cake-like.easy+spectacular100%wholewheatbread1

#vegan