Nourish + Brighten! Loquat + Emergen-C #DIY Facial Mask

Loquat Emergen-C facial maskHow about a smoothie for your face?

This zesty homemade mask will freshen, nourish, and brighten up your winter-weary skin.

When my tugboat man is home (and when son/DIL are here) we enjoy “Family Facial Day”.

To be honest, “enjoy” is a relative term, the boys describe it as “endure”.

Of course hub and son don’t participate without a lot of whining, but DIL and I can be fairly persuasive. There’s nothing funnier than using a scrub on a couple of men who’re complaining about how much it hurts like they’re being abused. Men are such babies even though they’re always pleased with the results.

For those of you that had to endure skin-drying heating all winter along with harsh snowy weather, this is a perfect mask to nourish and brighten.

In SoCal, we’ve had our hottest March ever recorded — coupled with low humidity, my own face was looking as parched as the Anza Borrego Desert.

Probably because it’s been so unseasonably warm, the first of our loquats are ripe.

As soon as enough of them are ready, I’ll make jam with our harvest (RECIPE HERE) but I thought I’d experiment creating a mask.

Loquats are full of vitamin-A — looking around our garden, I picked a lime for vitamin-C and a few leaves of white sage for cleansing and purifying. (If you live in an area where loquats don’t grow, you could use apricots or even peaches.)

loquatfacial1

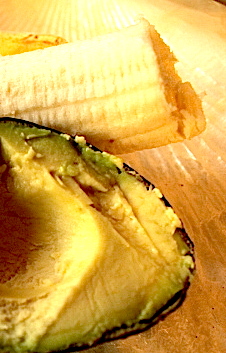
I tossed it all in the blender with bananas, avocado, and a squeeze of agave nectar.

Then I spied the secret weapon: Emergen- C!

With all the C and other vitamins and minerals, it’s like a healthy smoothie for your face. This is the one I used, but any flavor will work. Hopefully, it won’t tint your skin pink; it didn’t do that to me.
loquatfacial3loquatfacial2


I didn’t invent the Emergen-C facial; my research revealed others have discovered its benefits, too.

Facial Tips:

  • Start with a really clean face so the facial will be better absorbed.
  • Only make enough for one or two facials — as the ingredients are so fresh, they need to be used right away.

Nourish + Brighten Facial Mask Ingredients:

Loquats: Three small, remove seeds.
Lime Juice: Squeeze half lime
Banana: One half.
Avocado: One half.
Emergen-C: Half or whole packet.
Agave or honey: A teaspoon or two, just to make it sticky enough so the facial doesn’t slide off your face.
Sage: A few leaves (optional if you don’t grow it in your own garden.)
Try adding a few shakes of ground turmeric or cinnamon, too.

  • Toss it all in a blender until smooth.
  • Pat on your face, neck, décolleté (don’t forget that!).
  • Leave on for about fifteen minutes while you recline with a towel behind your head and neck to catch any spills.
  • Rinse off thoroughly and moisturize.
  • Admire the glow!
  • Refrigerate any leftover mask.

It’s been a couple of days since I did it; I’m very pleased with the results, and will absolutely make this again when the rest of the family is here.

It’s so much fun to torture the guys!


Super Moist #Vegan Chocolate Cake With Amaretto Coffee Frosting

Since I now focus most of my baking  to please Angel Boy 2.0 (the new and improved version), this was the winner of all the chocolate cakes I ever created, so I thought I’d share it again for those of you who do still currently turn on the oven and combine ingredients to conjure up lovely confections (not confessions). At 15 months, AB 2.0 can’t have chocolate; for now he’ll have to be happy with sugarless teething biscuits and kale smoothies. 


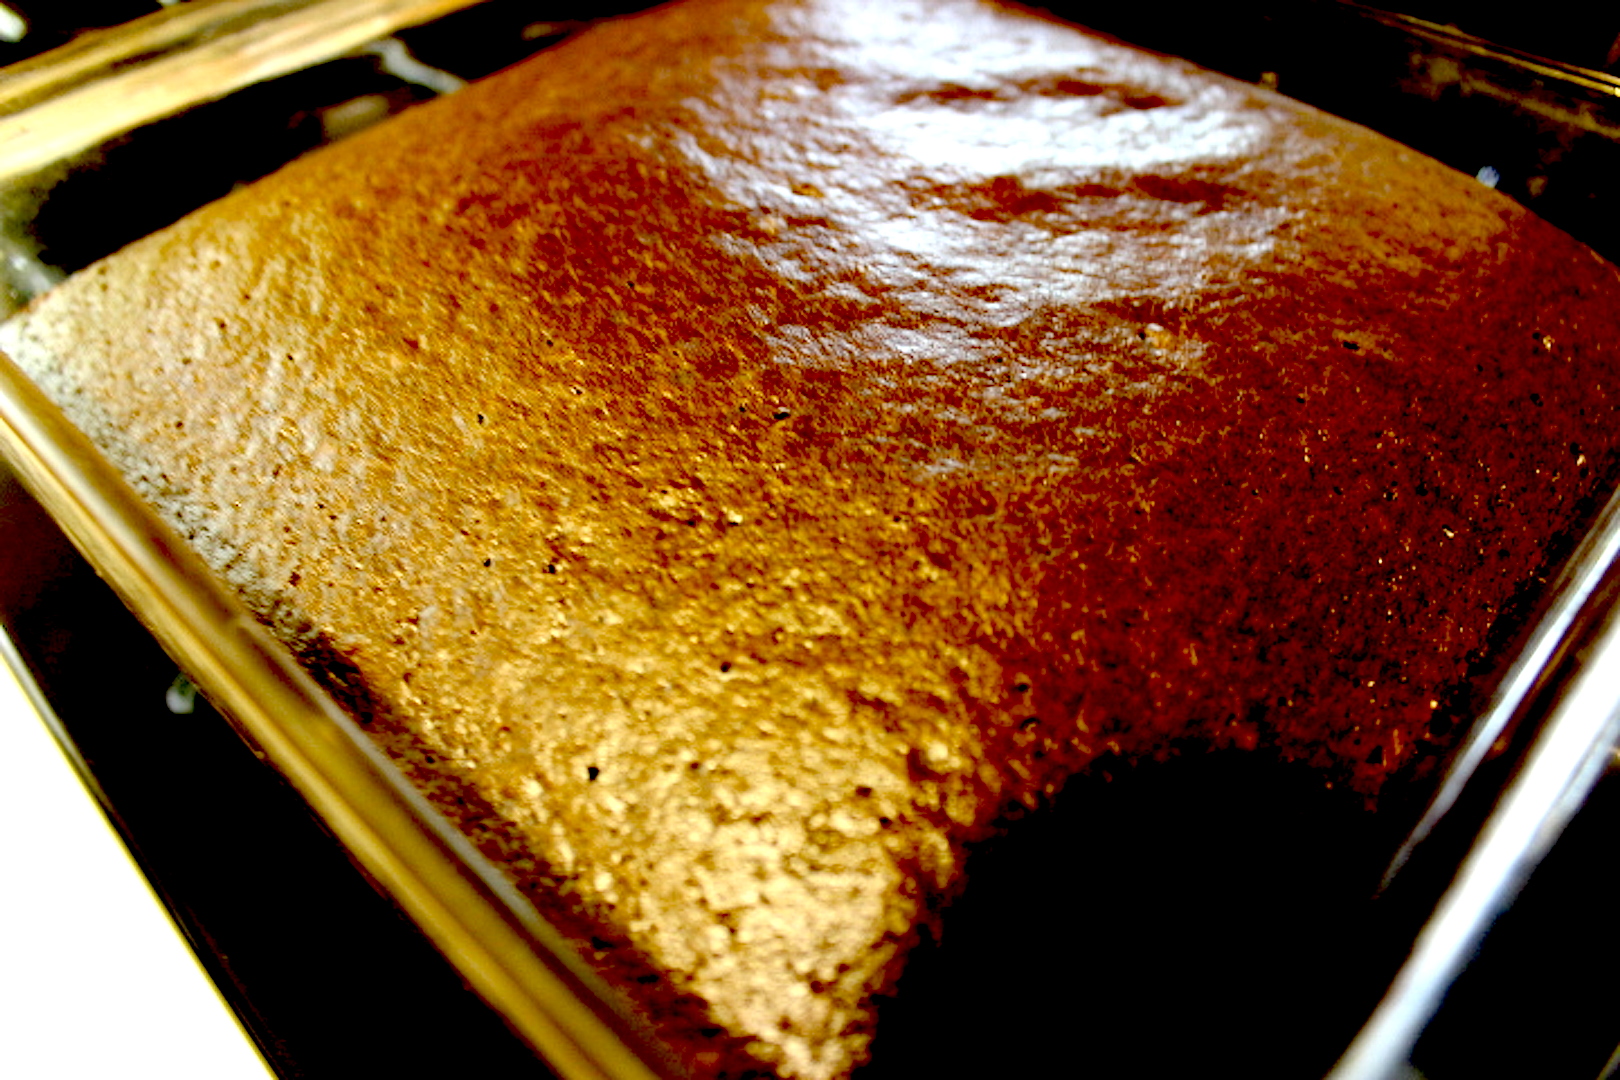
No eggs and no dairy, yet this cake is super moist, fluffy, and fudge-tastic — with a hint of French roast coffee and almond-y Amaretto.vegancakeTEXT

I was inspired by a recipe I found in my mom’s old cookbook — as always, I transformed it into my own version.

I know I use Amaretto a lot, but I ran out of vanilla and it’s a great flavor enhancer with chocolate and coffee.

Moist #Vegan Chocolate Cake With Amaretto Coffee Frosting

  • 1/2 tsp.  salt
  • 1 tsp. baking soda
  • 1 cup white sugar
  • 1/3 cup cocoa (unsweetened)
  • 1 1/4 cups flour (all-purpose)
  • 1 tsp. white vinegar
  • 1 tsp. pure vanilla extract (or Amaretto or Grand Marnier)
  • 5 Tbsp. vegetable oil
  • 1 cup cold coffee or water (coffee is better with chocolate) or you could always use soy/almond/cashew/coconut milk.

Directions

Preheat oven to 350 degrees F.

1. Mix the first five dry ingredients in a bowl.
2. Make three shallow depressions in the dry ingredients.
3. Pour vinegar in one, vanilla/amaretto in the other, and vegetable oil in the third.
4. Pour coffee/water over all.
5. Mix well until smooth.

Grease a nine-inch pan. Bake on middle rack of oven for approximately twenty-five to thirty-five minutes.  Check with toothpick to make sure it comes out clean. Don’t over bake or it’ll dry out. Cool and frost.vegancake4

Amaretto Coffee Frosting
Three tablespoons softened vegan butter substitute (I use Earth Balance)
Three or four tablespoons cocoa
1 1/2 cups powdered sugar
Amaretto or Grand Marnier or vanilla
Cold coffee

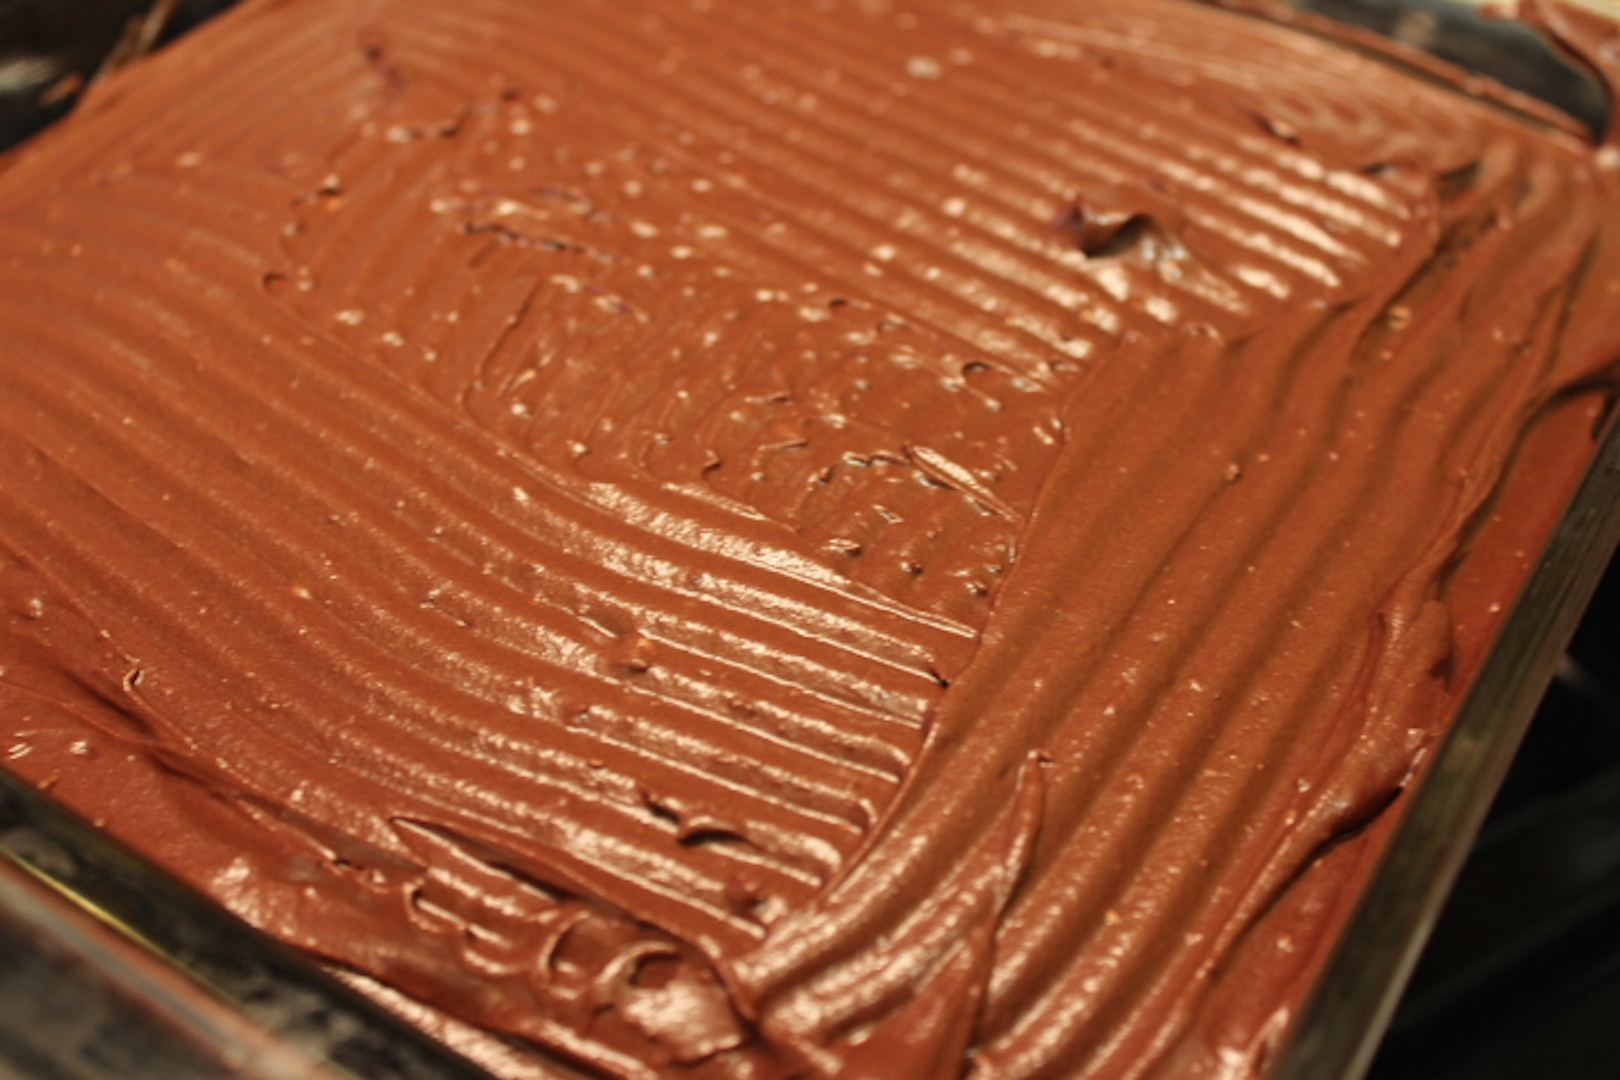
In a medium bowl, sift sugar and cocoa. Blend with vegan butter. Add 2 teaspoons Amaretto or other flavoring, and 3 tablespoons cold coffee, Blend until desired consistency. If too dry, add more coffee or Amaretto. If too wet, add more powdered sugar.
Frost cake and dust with sifted cocoa.

vegancake3

How to Bake This Seriously Easy Rustic Savory Uber Crusty Olive/Jalapeno/Garlic Bread

This is bread heaven.

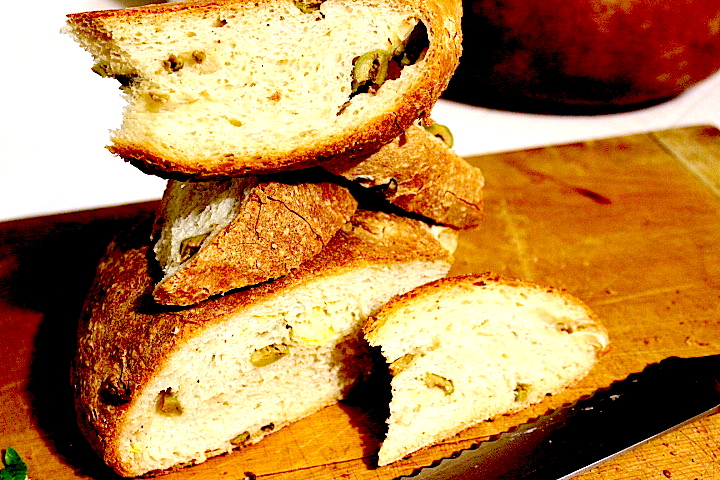
Crusty golden on the outside, chewy texture studded with olives, jalpenos, and garlic on the inside.

OK, listen to me. There is NO reason why you can’t recreate this masterpiece of textures and mouthwatering goodness.

If you think baking bread is beyond your skill set, think again.

Can you toss a few ingredients in a bowl, go away for a couple of hours, and throw a few olives and other things on top of the dough and mold it into a round shape?

Can you?

Of course you can.https://enchantedseashells.com/wp-content/uploads/2015/03/olivejalapenogarlicbread1.jpg

It’s so easy — not rocket science — and I guarantee success.

homemade bread recipe

Seriously Easy Rustic Savory Olive/Jalapeno/Garlic Bread

3 cups all purpose flour
1 package regular active yeast
1 1/4 cups warm water
1 1/2 teaspoons salt
1 tablespoon olive oil just for the rising bowl)

1 cup rough chopped olives (pitted)
2 jalapeños
3 cloves garlic

1. You can either sauté the jalapeños and garlic for a few minutes or leave them raw; it’s your choice. I used pickled jalapenos and garlic ‘cos I had them in the pantry.

2. In a large bowl, combine flour, yeast, salt, water. If you have a mixer with a dough hook, mix until it comes together in a wet ball. Add a bit more flour if it looks too wet, but you don’t want an overly dry dough.

3. If you’re doing it all by hand, old-school style, use a wooden spoon and put some muscle into it.

4. When it comes together, flour a cutting board and knead for a bit; this is a rustic bread so it doesn’t have to be perfect.

5. Oil a bowl with the reserved olive oil, place the dough in bowl, cover with a plastic bag, and set aside in a warm place to rise for a couple of hours. It helps to blanket the bowl with a towel, too.

6. After you can see the dough has doubled in size, turn the dough onto a floured wooden board. With your hands, roughly press the dough into a circle.

7. Add half the olives/jalapenos/garlic.

8. Fold the dough in half and gently press again to a rough circle.

9. Add the rest of the ingredients and form the dough into a ball shape.

Not so different than Play-Doh, right?

10. Line a baking sheet with parchment paper.

11. Dust the baking sheet with a teaspoon or so of cornmeal or flour.

12. Let rise again for about thirty minutes.

13. Toward the end of this second rising, preheat oven to 400 degrees.

14. Using a sharp knife, cut an X-shaped slit across the top of the dough.

15. Bake about forty minutes until the top is golden brown.

16. What I like to do toward the end of baking time is to take the bread off the baking pan and place directly on the rack to bake for another five-seven minutes. This ensures a completely even crunchy crust.

17. Take out of the oven, place on cooling rack.

It’s very important not to cut into it too soon! I know it’s hard to wait, but sometimes it’s a good idea.

Serve with homemade lentil soup and a fresh garden salad; this is truly bread heaven.olivebread3

Enjoy!

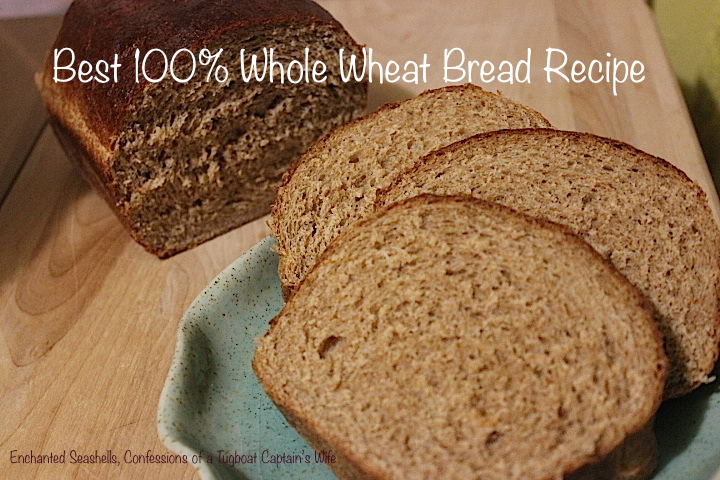
Best 100% Whole Wheat Bread Recipe

Easy+Spectacular 100% Whole Wheat Bread

Without a doubt, THIS is the absolute BEST 100% whole wheat bread I’ve ever made.

I have a Kitchen Aid stand mixer, but you can use a hand mixer with the bread hook attachment. And if you don’t have that, you can go totally old school with a big bowl, a wooden spoon, and get a great upper body work out. Sometimes I still make bread that way just to prove to myself that I can.

Easy + Spectacular Whole Wheat Bread 

One cup warm water (not too hot)
1/4 cup orange juice (I used fresh squeezed)
One packet yeast
1/4 cup agave syrup (honey or molasses works, too)
1/4 cup vegetable oil
3 1/2 cups 100% whole wheat flour, approximately.
One teaspoon sea salt

Mix water and orange juice plus agave in large bowl. Sprinkle yeast on top; stir.

Cover with a cloth for a few minutes to allow the yeast to bloom.

All at once, add, oil, THREE cups of flour, and salt.

With paddle attachment, mix for about three or four minutes. Switch over to the bread hook attachment and knead approximately 8-10 minutes, adding the last 1/2 (or so) cup flour a little at a time.

When the dough begins to form a ball and pull away from the sides, turn it out onto a floured board and knead by hand until it’s soft and pliable, not sticky.

Oil a bowl for rising, add dough, cover with plastic, and then cover with dishcloth. Let rise until it doubles in size. I like to find a non-drafty location like the oven or on top of a dryer.

When it’s doubled (about two hours), punch down gently and let sit on floured cutting board for a few minutes. Here’s my quick technique for shaping bread for a loaf pan.

Pat the dough into a rectangle — you don’t need to measure or be all OCD about it…

Fold in half. Starting at the folded side, roll into a cigar shape, pinch the edges closed, and pop into a loaf pan.

Try not to use too much extra flour ‘cos that will make it tough and dry.

Let it rise again for about thirty minutes or until the bread rises above the rim of the pan. Toward the end of the rising time, preheat the oven to 400 degrees.

Bake about thirty-forty minutes, checking to make sure it doesn’t become too brown. You can always cover the top with a piece of aluminum foil the last five minutes or so of baking.

When it’s done, let it cool for five minutes in the pan, then turn the bread onto a rack to finish cooling. Tap the bottom of the loaf with your fingers to see if it gives off a hollow sound. Then you know for sure it’s done.

Does this sound very tedious and time consuming? Just do it a couple of times, and it’ll be come second nature to you.

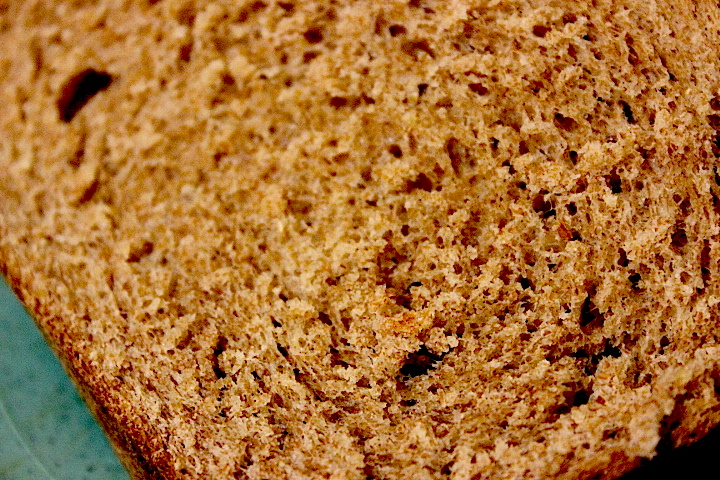
Homemade bread is SO much superior to store bought, chemical and preservative-laden bread. The texture of this bread is finely grained and tender; almost cake-like.easy+spectacular100%wholewheatbread1

#vegan

Thrifty Vegan Compost Soup

garbage soup1Don’t throw away those odds and ends! Instead, get creative.

Whether you call it Müllsuppe, Soup de Legumes Restes (Soup of Leftovers) Ordures Soupe, Garbage or Compost Soup — in any language, this healthy soup is a delightful melange of everything the refrigerator and pantry has to offer.

I love nothing more than the game of conjuring up a delicious concoction from available ingredients and not always running to the store. Being frugal means more shopping for me — that’s my logic!

My son made a spur-of-the-moment decision to visit for just one day (to celebrate his bio-dad’s birthday) before he leaves the west coast for a teaching position at Rutgers.

This meant that I had to spring into action; baking and cooking a day’s worth of meals.

When my tugboat man is gone, I don’t do very much grocery shopping; the cupboards were mostly bare.

I opened the refrigerator door and peered inside where I found a few carrots, celery, half an onion, a few mushrooms, a few heads of broccoli, a bit of fennel, a block of tofu, and most of a can of chopped tomatoes.

As soon as I looked in the pantry and found pearl barley and lentils, I knew exactly what to do.

Springing into action, I sautéed the vegetables in a bit of olive oil until they were tender. I added the tomatoes, about six cups of water, and the lentils.

Pearl barley takes a lot longer than anything else; cooking in a separate pot would make sure that it was completely soft before adding it to the rest of the ingredients.

While everything was bubbling away, I cubed the tofu and tossed it in with a few tablespoons of chopped cilantro, a bay leaf, pepper, and a sprinkle of freshly ground pink Hawaiian salt.

A couple hours later, the barley was ready to be incorporated into the big pot of soup.

With a salad of mixed greens dressed in my favorite lime vinaigrette, freshly baked foccacia, and a dessert of Banana-Blueberry Walnut Bread, my son was well-fed, and I was so pleased with myself for making something out of nothing.

(And it saved me from having to throw all the veggies in the compost bin!)

garbagesoup2YUM!

What successful dish have you created out of nothing?


Facebook Update: I’m sorry to report that I still have no access to any of my Facebook pages; Since it’s understandable that I’m unwilling to provide a birth certificate to prove that my name is Princess Rosebud, if you’d like to share my posts on your timelines or mine, I’d appreciate it. Otherwise, Twitter and Pinterest will be my only forums for socializing. It’s really unfair to be singled out, since there are many others who don’t use their real names on Facebook and they are allowed to continue.

Super Easy Vegan Chocolate Ice Cream

veganchocicecreamBeyond easy. Very chocolately.

Chocolate Mocha Vegan Ice Cream with Amaretto

Three cups unsweetened original almond milk (or any combination of non-dairy beverages, including coconut or a little coconut cream.)
1/4 cup cold coffee or espresso
2/3 cup brown sugar
3/4 cup cocoa
1/8 teaspoon salt
One tablespoon vanilla
One tablespoon Amaretto

Sift cocoa, add all other ingredients. Whisk to combine. Chill for at least four hours. Pour into your favorite ice cream maker; I have a Cuisinart. 

That’s all there is to it; easy, easy, easy!

The texture is a bit more sorbet-ish than creamy custardy dairy ice cream, but no one around here is complaining!

The addition of coconut milk or coconut cream will definitely smooth out the texture but I didn’t have any in the pantry, so I used what I had.

**For a fancy decadent treat, spill Amaretto over a fresh scoop in a pretty cup, garnish with mint, and enjoy!

Zesty Veggie Hummus Pinwheels

FINALzesty

Veggie Hummus Pinwheels are the perfect choice for a summer party or barbecue.

Hummus is so easy to prepare from scratch that it’s a staple here at Casa de Enchanted Seashells. (Recipe below.)

It’s mostly all prep work. Organizing your ingredients makes it easy. I don’t like onions, but the addition of a thinly sliced red onion would be a wonderful crunchy flavor enhancer.

veggie roll up 4I used a handheld mandolin to thinly slice the veggies. Carrots, bell pepper, mushrooms, cucumber, microgreens, and freshly steamed, chopped spinach. Make sure you squeeze out all of the cooking juice and save for soup stock later in the week.

I had some leftover guacamole and used that too. Organic pea shoots and cilantro (coriander to you all from across the pond) rounded out the healthy deliciousness.

**For a really low calorie option, use a large lettuce leaf instead of a carb-filled tortilla.veggie rollup5Simply spread, layer, roll, and cut.

Spread with hummus, guacamole, spinach (this one doesn’t have spinach, but I used a slice of veggie cheddar cheese. The important part is to layer all the veggies on the side of the wrap or tortilla closest to you. Sometimes I heat the tortilla to make it a little more pliable.

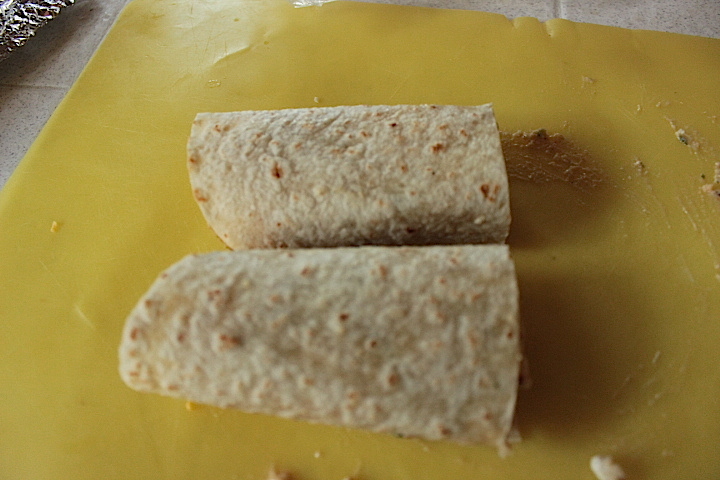
vegroll1 Start rolling, keeping it tight. That’s the secret to a successful roll up. If you’ve ever made sushi, it’s the same principle, without using a bamboo mat. vegroll2 Tah dah! A fat little cigar shaped roll of yumminess.vegroll3 Cut in half with a sharp knife. 

vegroll4Keep cutting…eating the ends as you go. Well, at least that’s what I did.
veggie rollup3 Turn them up so they’re smiling pinwheels, choose a special serving platter, and add a little garnish: here I used cilantro, pea shoots, and thinly sliced LIME.  

Beautiful, festive, healthy!FINALzesty


BASIC HUMMUS:

One 15 oz. can unsalted garbanzo beans (or your own from scratch)
Four garlic cloves
Six tablespoons lemon juice
One-third cup tahini
Salt, pepper, hot pepper sauce

Drain beans, but save juice. Toss it all into a food processor and blend until desired consistency. Add a little juice from the beans as needed. Season to taste.
That’s it! Couldn’t be any easier, right?
Options: Add chopped, drained spinach, jalapeños, roasted red peppers, etc. Use your imagination and experiment. It’s all tasty. Especially if you add a squeeze of lime…

Vegan Lentil Tofu Tempeh Loaf Recipe

loaf9

I’ve been experimenting with all kinds of protein packed vegan loaves and “burgers”.

Some are winners, some are not.

When my son and DIL visited last month, DIL and I teamed up to build a delicious and healthy loaf, but I didn’t get a chance to take pics. They’ll be back tomorrow and I’ve attempted to recreate our original recipe.

(Measurements are sort of inexact…if it looks a little dry, add veggie broth. If it’s too moist, add more bread crumbs or oats.)loaf2

If you’re not familiar with tempeh, here’s an explanation: Tempeh is fermented cooked soybeans (or grains). This fermentation binds the soybeans into a compact white cake. Tempeh has been a favorite food and staple source of protein in Indonesia for several hundred years. It’s low fat and high in protein.

How to make my Vegan Lentil Tofu Tempeh Loaf:

loaf1

1. Cook lentils, onion, carrots, celery with two cups water until tender. Check as lentils are cooking and add water as needed so they’re moist yet fully absorb water, about thirty-forty minutes.

2. Turn lentils into large bowl.

3. Crumble tempeh and mash tofu with lentils.loaf3

4. Add rolled oats, chia, and chopped nuts.(I used a mixture of almonds and cashews.)loaf45. I like to use my hands to mix everything together so I get a feel for texture and whether it’s too dry or too moist. You def don’t want it too dry or it’ll fall apart.
6. Tear whole wheat bread into small pieces, Mix.
7. Add olive oil, ketchup or tomato sauce, mustard, curry, salt, pepper, vinegar, hot pepper flakes, Worcestershire sauce.
8. Mix, taste, and adjust seasonings.
9. Fill greased loaf pan, form patties with any extra.
Topping: Ketchup mixed with a little maple syrup.loaf6loaf5Bake at 350 degrees for about 45 minutes. Serve with ketchup or vegan gravy. Tastes good hot or cold! Let cool in pan before slicing. Making a day ahead is even better.loaf7

YUMMY!


Recipe: Vegan Lentil Tofu Tempeh Loaf

Tempeh, one package
Tofu, one tub firm organic
Two cups cooked lentils
1/2 cup chopped nuts
One cup rolled oats
One or two slices whole wheat bread
Chia
1/2 chopped onion
Two carrots, chopped
Two stalks celery, chopped
One cup tomato sauce ( I used homemade) or ketchup
Veggie broth as needed
Two tablespoons olive oil

One or two tablespoons Dijon mustard
Curry Powder to taste
Pepper
Salt
Hot pepper flakes
One tablespoon rice wine vinegar
Worcestershire sauce

Not Kegel… But a KUGEL-icous Recipe for Thanksgiving

Sounds like Kegel, but it’s not, lol.

Yes, this year everything is a bit different, but there’s always something to be grateful for. I’ll just have to wait a bit to cook all of my most requested recipes for everyone, but that’s OK as long as we’re safe and healthy.

Let me introduce you to one of our family traditions:

It’s KUGEL, another carb-filled recipe for holiday entertaining to go along with stuffing. The original Angel Boy and DIL request it every year for Thanksgiving and Hannukah.

It’s not a vegan recipe, but it will be if you simply eliminate the eggs. 

 What is Kugel?

Of German/Jewish origin, Kugel is a savory or sweet pudding of potatoes or noodles usually served as a side dish.

Our family’s traditional Kugel is the sweet noodle kind and my mom’s version is to die for.

Really. It’s spectacular hot or cold or reheated.

It’s one of those recipes you can make a day in advance and it keeps getting better and better.

If you have any leftovers– which we never do — it freezes pretty good.

I limit myself to making it only a couple times a year and I eat as much as I want and just work out a bit harder and a bit longer to burn off the calories, so there’s really no guilt.

Angel Boy’s Grandma’s Kugel

Ingredients:
One large package wide egg noodles
One large can fruit cocktail in juice
One small can pineapple pieces in juice
One large can canned peaches and pears in heavy syrup, yes, you read that right
At least 3 Granny Smith apples, sliced with about 1/3 cup sugar and 1-2 TBS cinnamon
3 eggs (or not)
2 tsp vanilla
One lemon, juiced and zested

Directions: This is a good dish to make in advance especially if you’re also planning to make apple pie (which I am) ‘cos you can just prep all the apples for both dishes. The secret to this dish is a LOT of cinnamon. If you think you have enough, add a little bit more!

1. Cook a whole package of wide egg noodles and drain.
2. Add 3 beaten eggs with vanilla; it will be super slippery.
3. Add the lemon juice and zest to the apple slices.
4. Drain all the canned fruit but keep the juices; you will need them.
5. Mix together all the canned fruits.
6, Butter one large and one medium deep baking dish.
7. Add a layer of noodles, then a layer of canned fruit, a layer of apples, then another layer of noodles, a layer of the canned fruit, sliced apples, more noodles, more canned fruit and apples, ending with a final layer of noodles.
8. Pour over any remaining egg mixture, and a cup or so of the fruit juices. Be very liberal with the juice. It will all get soaked up as the kugel bakes.
9. Jason’s grandma would dot the whole thing with a bunch of Crisco, like ¼ cup, which sounds gross, but I still follow her recipe. Some people use butter, but we don’t. Other recipes add cottage cheese and raisins, but I’ve only made it my mom’s way, although I’m sure it would be delicious.
10. Bake covered at 300 degrees for about an hour or so depending on the pan size. Take cover off for final 15 minutes. Excellent reheated and/or cold.

Bon apetit and Happy Cruelty-free Vegan Thanksgiving!

DELICIOUS Sweet and Savory Vegan Holiday Recipes with Food For Life Bread

When Food for Life sent me a box of assorted breads to sample and review, I couldn’t wait to begin to experiment with recipes for Thanksgiving.

We are thankful to enjoy a meat-free, cruelty-free Thanksgiving dinner.

We LOVE bread and as tasty as these breads are on their own — stand alone goodness — I wanted to craft a few recipes and share them with anyone looking to eat healthier and of course, vegan.

These breads are gluten free, vegan, and USDA certified organic.

My family especially enjoys the bread toasted, which brings out all of the unique flavors. They are amazing simply with hummus or in veggie sandwiches.

For holiday baking ideas, here’s one dessert bread pudding, one savory bread pudding, and my version of a vegan stuffing.


1. Vegan Bread Pudding (Sweet)breadpudding1

*****This is a MUST for you to make. It’s so unbelievably good, I ate the biggest bowl as soon as it came out of the oven. OK, to be honest, I ate TWO bowls. (That’s like half a loaf of bread haha). It was even better than I had anticipated.

The blueberries and apples are key to the whole moist yumminess and the slight toasty crunch of coconut is amazing. Next time I’ll add a tablespoon of orange zest to brighten the fruity flavors.

Ingredients:

One loaf Food for Life Sprouted For Life Bread Gluten Free Cinnamon Raisin with sprouted chia, quinoa, and millet. (The Almond version would be awesome, too.)
2-3 cups plain or vanilla almond milk, really SOAK the bread
1/2 cup brown sugar
3 tablespoons pure maple syrup
1 teaspoon vanilla
1/4 cup raisins
1/4 cup dried blueberries
One apple, peeled, diced
Ground cinnamon
Toasted coconut for topping 

breadpudding2Instructions:

  1. Preheat oven to 350° degrees. Grease a nine-inch baking dish or casserole dish.
  2. Tear the bread into rough cubes.
  3. In a large bowl, whisk together milk, cinnamon, sugar, maple syrup, and vanilla. Add the bread, let sit about 10-20 minutes, or until bread is soft and has absorbed most of the milk. Add the raisins gently mix. Don’t over mix.
  4. Scoop into prepared pan.
  5. Lightly sprinkle top with a little more cinnamon and the coconut.
  6. Bake 30-45 minutes until all the liquid has been absorbed and it’s a puffy golden brown.

YUM! Just TRY to stop eating it.
I think it’d also be awesome with your favorite sauce
or a 
scoop of vegan ice cream.
breadpudding3


I don’t have pics of the next two because I didn’t want to prepare them too far in advance, but I wanted to share the recipes so you’ll all have enough time to shop for the ingredients.

2. Vegan Bread Pudding (Savory)

Ingredients:

One loaf  Food for Life Sprouted For Life Bread Gluten Free (Flax Seed is the one I’ll be using.)
1 bunch Swiss chard, kale, or spinach (about 1 lb.)
1 cup almond or soy or rice milk
1 cup vegetable broth (low sodium)
2 teaspoons Dijon mustard
1 teaspoon salt
3/4 teaspoon pepper
1/4 teaspoon red pepper flakes
3 cups cubed bread
8 ounces sliced fresh mushrooms
1 red bell pepper, chopped
1 small onion, chopped
1 tablespoon minced garlic
2 tablespoons olive oil
Sliced tomatoes
Option: Add tofu cubes

Directions:

1. Preheat oven to 350°. Remove and discard ribs from Swiss chard or kale. Rinse with cold water; drain and coarsely chop. If using spinach, wash and chop.
2. Whisk together milk, broth, salt, pepper, red pepper flakes. Stir in bread.
3. Sauté mushrooms, onions, garlic, red pepper in hot oil until tender and soft. Stir in chard, kale, or spinach, and sauté 2 minutes. Fold vegetable mixture into liquid/bread mixture.
4. Top with thinly sliced tomatoes.If you have a vegan cheese that you like, crumble a few slices on top of tomatoes.
5. Pour into a lightly greased 11- x 7-inch baking dish. Bake at 350° for 35 to 40 minutes or until center is set. Let stand 5 minutes.


Vegan Stuffing (Dressing)

Yummy to stuff green or red peppers or baked butternut squash, halved. I serve with my homemade cranberry sauce. No one misses the meat and if they do, they know better than to mention it! This recipe makes enough to feed our family and have leftovers the next day.

2 medium onions, diced
6 stalks celery with leaves, diced
4 carrots, diced
6 cloves garlic, chopped
Two loaves of Original Three Seed Sprouted for Life Food for Life
1/3 cup fresh parsley, chopped
1 teaspoon celery salt
1 teaspoon dried sage, crumbled
1 teaspoon dried rosemary, crushed
1/2 teaspoon dried thyme, crumbled
1/2 – 3/4  teaspoon freshly ground black pepper
1 1/4 cups hot Homemade Vegetable Stock or a good quality low sodium purchased veg stock

Directions:
1. Saute onion, carrots, and celery, stirring occasionally until soft, 15 to 20 minutes. (Vegetables can be prepared up to 1 day ahead and refrigerated. Reheat before continuing.)
2. Transfer to large bowl and add stuffing cubes, parsley, celery salt, sage, rosemary, thyme, salt, and pepper. Stir in 1 1/4 cups hot stock.
3. If stuffing peppers or other vegetables, stuff lightly and bake for about 30-40 minutes.
4. If baking entire recipe as side dish: Preheat oven to 350°F and grease 3-quart casserole or 9- by 13-inch baking dish. Transfer stuffing to dish and drizzle with 1/2 cup hot stock. Cover with aluminum foil and bake until heated through, about 30 minutes. Uncover and bake until top is slightly crisp and golden, about 10 minutes longer. Serve immediately.

Of course you can add or detract any vegetables your family doesn’t like (our DIL doesn’t like mushrooms so I’ll make a small batch for her without them) and add more herbs and spices depending upon your own personal tastes. We like it rather peppery with bold flavors since it’s more than just a side dish.

Bon appétit!

I received product for sample and review, no other compensation. My opinions are my own.
http://www.foodforlife.com/