Raspberry and Chocolate Bars. YUM.

Rah Rah Raspberry Chocolate Layered Oat Bars
raspberrychocbar4Tugboat man and I stopped at a Boudin Bakery located in South Coast Plaza ‘cos he was famished — he doesn’t have the same kind of stamina that I’m blessed with — to keep going until that holy grail has been attained.

Of course I’m speaking of shopping.

We took a five minute break so the whingy one could have some sustenance  – a little snack, a boost of energy — just enough to walk around the mall one more time.

Christian Louboutin, Jimmy Choo, Hermes, Chanel.

(Poor guy. He’s so sweet, He suffers for me, he really does.)

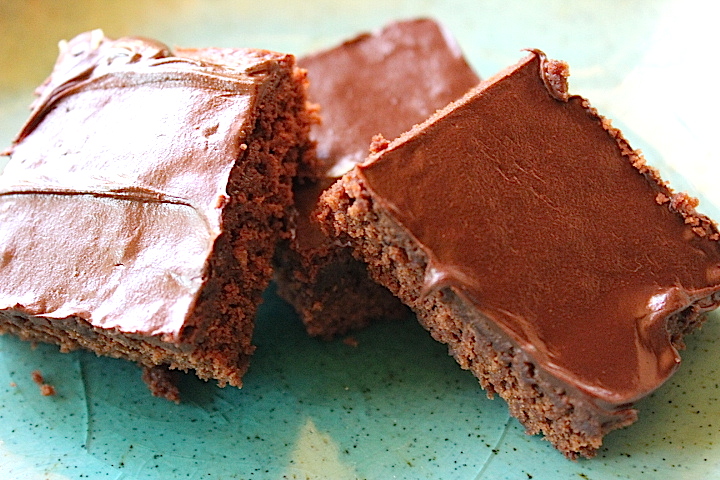
We shared a Raspberry Chocolate Bar that was SO unexpectedly mouthwatering I couldn’t wait to attempt a recreation.

It’s in the oven now. Tugboat man and I’ll have a taste comparison to see if it measures up.

OK, we patiently waited and enjoyed a square of my version of their Raspberry Chocolate Bar along with a cup of ginger tea.

The verdict? DELICIOUS, but not EXACTLY the same, yet so good, it doesn’t really matter.

In every bite there’s creamy rich chocolate along with the crunch of oats and zesty raspberry. SO GOOD. 

Try it!

(Next time I’ll use fresh raspberries or pure unsweetened jam to control the amount of sugar.  We felt this recipe was a bit TOO sweet but that only meant we couldn’t have as large a piece as we wanted.)


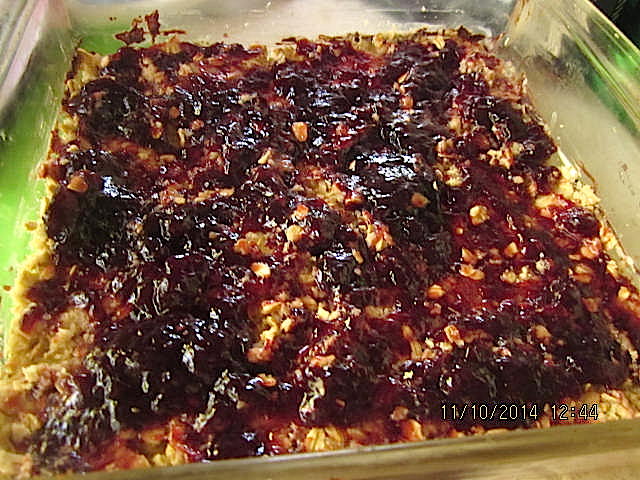
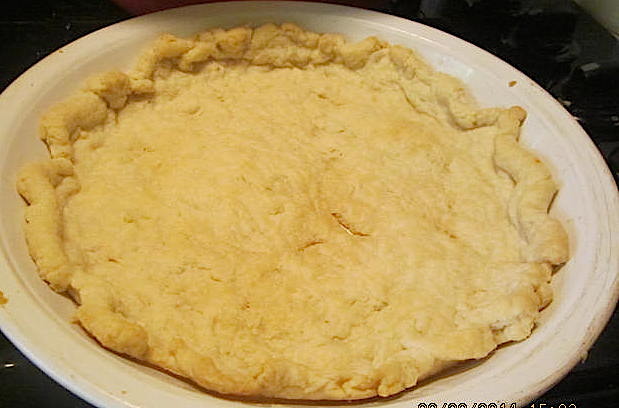
After firmly pressing bottom dough, spread with jam.

raspberrychocbars
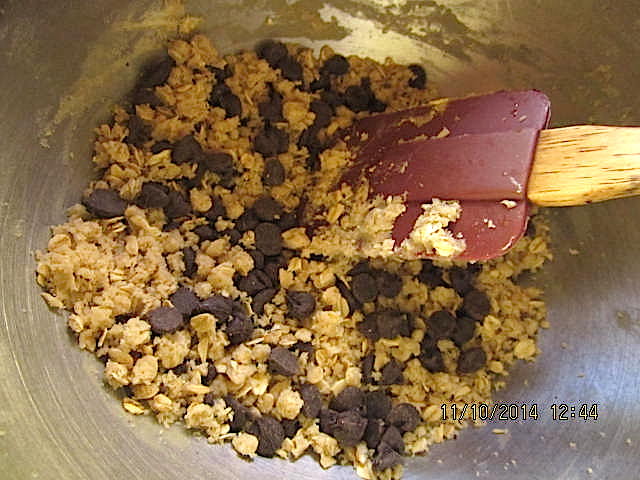
Add the chocolate chips, yum!
rasberrychocbars1
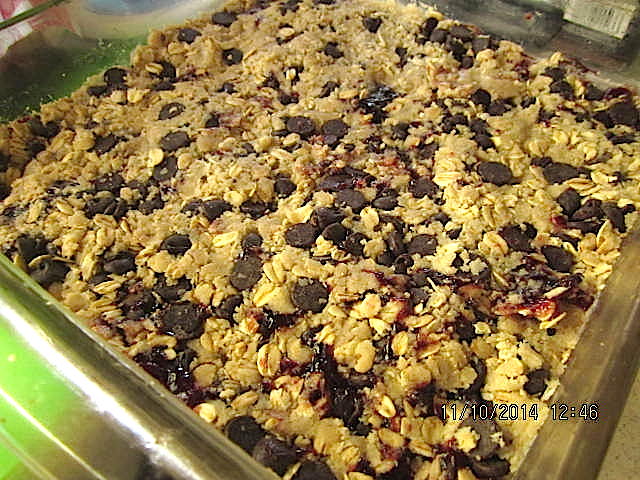
Carefully press top dough over jam.
raspberrychocbar2
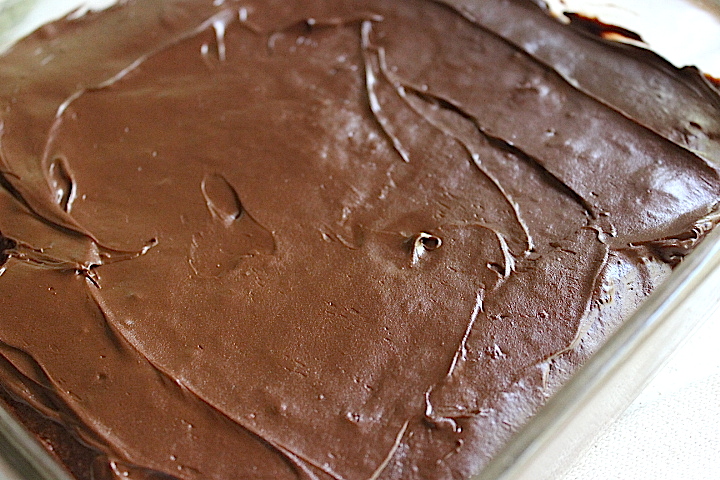
Golden brown, it takes a long time to cool and firm up before cutting and eating. Be patient! Tip: Refrigerate to hasten setting up.raspberrychoc3

Chocolate Raspberry Layered Oat Bars

1 cup all-purpose flour
1 cup rolled oats
1/2 teaspoon baking soda
1/4 teaspoon salt
3/4 cup packed brown sugar
4 tablespoons butter, softened
2 tablespoons vegetable oil
1/3 to 1/2 cup semisweet chocolate chips
3/4 cup seedless raspberry jam

Preheat oven to 375°

In a medium bowl, combine sugar, butter, oil. Beat with a mixer at medium speed until smooth. Add flour, oats, salt, baking powder and stir until well blended (mixture will be slightly crumbly.).

Remove 3/4 cup of dough; toss with chocolate chips. Set aside.

Press the remaining dough firmly into an 8-inch square baking pan, and spread evenly with jam. Sprinkle with chocolate chip mixture and again press firmly.

Bake at 375° for thirty minutes or until golden brown. Cool completely on a wire rack before cutting into squares.


Picture of a Rose

Is there anything more perfect than a perfect rose?roseCanon Rebel T3i
1/100  5.6

Ultimate Smoothie Recipe

Yup, another smoothie recipe.

Don’t HATE.
Don’t say YUCK.
Don’t roll your eyes at me.
TRY IT!

smallsmoothieI’ve  been torturing my family for years, forcing them to drink the sometimes often dreadful concoctions that I formulate from a deranged aggregate of ingredients — adding a little of this and a little of that — sometimes palatable, sometimes not.

While the raw Cauliflower-Brussel Sprouts Smoothie was NOT a winner, I think I’ve finally developed the perfectly Ultimate Smoothie.

  • Tastes delicious
  • Nutritious
  • Helps with digestive/gall bladder issues (me)
  • Provides lots of energy

Ingredients:

  • Garden of Life Raw Protein Powder in Vanilla, Vanilla Chai, Chocolate, or Marley Coffee
  • Slippery Elm powder, great for digestion
  • Flaxseed Meal, full of healthy fiber
  • Chia seeds
  • EmergenC, one or two packets
  • Beets, canned/unsalted or from my garden (good for gall bladder)
  • Garden of Life Perfect Food Raw Organic Wheat Grass Juice Powder
  • Garden of Life Perfect Food Raw Organic Powder
  • Juices:  A combo of Rio Red Grapefruit, Apple, Mango, Cranberry
  • Banana (one or two)
  • Any other fresh fruit, this time I used blueberries and pears, but anything you have is yummy —  from peaches to watermelon
  • Nonfat yogurt, regular or Greek for more protein or soy/hemp/almond milk for vegan.
  • Ginger (to taste, I use about an inch-peeled)
  • Turmeric powder…great anti-inflammatory (1 teaspoon)
  • Cinnamon (1 teaspoon)
  • Ginseng (I use Korean Ginseng tea granules)

Additions: I usually add a handful of kale, chard, spinach, parsley, mint…just about any greens, even dark leafy lettuce

I throw it all in the blender and process until very smooth. You’ll never taste the greens or the beets, but they add a bright undertone to the fruit.

If you have a lime or a lemon, add a squeeze or two. I have a friend who tosses in a whole orange, peel and all, from her own organically grown tree. I’ve never done that, but it’s certainly an option.

Whether you try my smoothie as a meal replacement (like I do) or as a healthy between-meal snack, my Ultimate Smoothie will provide added energy and lots of nutrition for your busy day.

P.S. Yes, I use a lot of ingredients, but it’s still easy to do and can be made anywhere if you have a blender or even an immersion blender.

Bon appétit!

I hate swallowing vitamins and supplements but the smooth and creamy texture of my ultimate smoothie helps them go down without gagging.

Since I’ve been taking Garden of Life Kind Organics supplements, I feel so good and it’s really helped with my digestive issues (and my son is a fan, too!) I’m a big believer in pre and pro-biotics, balancing intestinal flora and fauna, and you remember I’m a junkie for wheat grass!

Here’s what I take every day:
Garden of Life Primal Defense
Garden of Life Fungal Defense
Garden of Life RAW Enzymes Women
Garden of Life Kind Organics Women’s Multi 40+

My tugboat man and son have the same routine, but theirs is especially formulated for men.

Enloy and be HEALTHY!

A Secret Cathedral at the Grand Staircase-Escalante National Monument

We had one last detour before our final destination of the magnificent Zion National Park.

Our goal was to pack in as many sights as we could on our ten-day trip.

We were up early for a short hike to a lookout at Lake Powell.

Glen Canyon Dam.lakepowell

Lake Powell, with hardly any water in the middle of this drought.lakepowell3 Beautiful cliffs.lakepowell1

Back on the road, we turned off the main highway and set out on a dusty, bumpy, red-dirt path barely wide enough for one vehicle — more like a wagon train trail — several miles off the main road to a trailhead that would lead to an amazing slot canyon hike.

The Grand Staircase-Escalante National Monument, at 1.7 million acres, dominates southern Utah.

It’s unique in that it is the first monument to be administered by the Bureau of Land Management, rather than the National Park Service.

The Grand Staircase is a geological formation spanning eons of time and is a territory of multicolored cliffs, plateaus, mesas, buttes, pinnacles, slot canyons, and world-class paleontological sites..

After hiking for about and hour or so, clambering up and out of narrow and shady slot canyons that seemed to go on forever, passing a random cow or two, the “cathedral” emerged in a open space bathed in sunlight.

It was really, really, really, REALLY special. Words can’t describe it and my pics don’t do justice to its beauty.vermillioncliffscathedral

I don’t know why it’s “secret” except that a couple of experienced hikers we chatted with at the trailhead shared a few of the highlights of the area and cautioned us not to be TOO specific when we talked about where we were to avoid it becoming overcrowded. vermillioncliffs vermillioncliffs1 vermillioncliffs2 Spectacular. WOW.vermillioncliffs4 This is supposed to be one of the longest slot canyon hikes in the country, if not THE longest. We hiked for about three hours in, a six-mile round trip.vermillioncliffs5 vermillioncliffs6 ME! vermillioncliffsme Vermillioncliffs10 Vermillioncliffs11 vermillioncliffs12

Next stop, ZION!

YUMMY Chocolate + Black Beans + Beets Brownies

plus

http-www-cocoavia-com

http-www-cocoavia-com

and

wikimedia.org/wikipedia/commons

wikimedia.org/wikipedia/commons

equals

chocolate cakeplate

Now, don’t you all go rolling your eyes at me.

I used to be a teacher and I still have eyes in the back of my head.

I can see you.

Before you make all those gaggy sounds and scrunch up your face (you know who I’m talking to!), I implore you to TRY these very tasty and UBER healthy brownies.

Well, not all that healthy ‘cos of the sugar and chocy chips, but cocoa beans grow on a tree, so that makes them a plant — therefore sort of a veggie or a fruit. So, healthy, right?

Don’t be all judge-y and shake your head.

TRY them for me, OK?

Black Bean + Beet Brownies

  • 1 can or 3/4 cup cooked black beans (unsalted or rinse well)
  • 2 tablespoons – 1/4 cup unsalted cooked beets or finely shredded raw beets (Yes, BEETS!)
  • 1/2 cup vegetable oil, or olive oil(I always use a bit less)
  • 2 eggs *see below for vegan substitution*
  • 1/2 cup unsweetened cocoa powder
  • 2/3 cup sugar ( I’ve tried brown sugar and I’ve tried agave, not sure what’s better, kind of a personal taste thing)
  • 1 teaspoon instant coffee or espresso or leftover cold coffee
  • 1 teaspoon vanilla extract
  • 1/2 cup mini chocolate chips, divided
  • 1/3 cup flour
  • 1/2 teaspoon baking powder
  • 1/2 teaspoon salt

Top with Best Baking Hack Ever frosting (click for recipe)

Directions

Preheat the oven to 350 degrees F. Grease a 9 by 9-inch square baking pan. In a blender or food processor, puree the beans and beets with the oil. Add the eggs, cocoa, sugar, coffee, and vanilla. Melt half the chocolate chips and add to the blender. Blend on medium-high until smooth. In a small bowl, whisk together the flour, baking powder, and salt. Add to the blender and pulse until just incorporated. Stir in the remaining chocolate. Pour into the prepared pan. Bake until the surface looks somewhat matte around the edges and still a bit shiny in the middle, about 20 minutes. Let cool at least fifteen minutes before eating. My family thinks they taste better the longer they sit in order for any “beany” texture to dissipate.

Best Baking Hack Ever

bakinghack1 bakinghack2 bakinghack3


Wanna go vegan? 

  • 1 Tbsp. Chia Seeds
  • 3 Tbsp. Water

With food processor, spice grinder, or old school mortar and pestle, grind the chia seeds into a meal. Mix the water and ground chia seed meal in a small bowl. Allow to sit for 5 minutes or so, or until it takes on a gloppy texture similar to raw egg yolk.

Drops and Drips: Water

Water is essewaterbottlesntial for life.

We all know this; we all carry disposable or reusable bottles of water —  water is a billion dollar industry.

Here in California, the drought is so extensive that restaurants don’t automatically serve water; you have to request it.

There are voluntary water restrictions for lawns and gardens.

Yet there’s water all around us if we only LOOK.

Wasted water.

Dishwashing water, washing machine water; water swirling around our feet in the shower  —  all lost down the drain.

It really frustrates me that there isn’t a easy way to reclaim this “gray water”.

My tugboat man and I are committed to leaving as small a footprint as possible and to be good stewards of this world, yet even for my guy who has a degree in nautical engineering, figuring out how to make a gray water system in our home is not as easy as I assumed.

Our challenge is a tri-level home with the laundry room on the third floor — apparently you can’t just stick a hose out the window — according to hub, it’s more complicated than that.

We, but I really mean HE is designing a functional system, but every single time I see a drop of water down the drain instead of being diverted to the garden, I get very sad!

To honor precious water and its importance to our bodies, check out this series of photos I took at my photography class.

I haven’t liked doing anything this much since I discovered the magic of that little plastic card that meant all the pretty treasures could come home with me!

My son reminded me of our kitty, Bandit, who loved to sit in the sink and drink dripping water. Still miss her so much…

waterdrip6 waterdrip5 waterdrip4waterdrip3waterdrip2Part One, October theme, Healthy Living


Not a Sunflower

And not an artichoke, either.

These are SUNCHOKES.sunchoke1 I wonder what they taste like. Anyone tried them?sunchoke2According to Wikipedia, The Jerusalem artichoke (Helianthus tuberosus), also called sunrootsunchokeearth apple or topinambour, is a species of sunflower native to eastern North America.It is also cultivated widely across the temperate zone for its tuber, which is used as a root vegetable.[2]

I haven’t harvested my tubers yet ‘cos I’m still enjoying the flowers — that’s about all that’s flourishing in my garden during this horrible drought in California — but when I do, I’ll probably roast them with garlic, since we got a HUGE string of garlic from Gilroy, the garlic capital of the world, the last time we drove through central Cali.

Sunchoke Liqueur

Sunchoke Liqueur

Have you ever tried sunchoke liqueur? Maybe best of all, in Baden-WürttembergGermany, over 90% of the Jerusalem artichoke crop is used to produce a spirit called “Topinambur (de)”, “Topi” or “Rossler”.[13] By the end of the 19th-century, Jerusalem artichokes were being used in Baden to make a spirit called “Jerusalem Artichoke Brandy”, “Jerusalem Artichoke”, “Topi”, “Erdäpfler”, “Rossler”, or “Borbel”.

Jerusalem artichoke brandy smells fruity and has a slight nutty-sweet flavour. It is characterised by an intense, pleasing, earthy note. The tubers are washed and dried in an oven before being fermented and distilled. It can be further refined to make “Red Rossler” by adding common tormentil, and other ingredients such as currants, to produce a somewhat bitter and astringent decoction. It is used as digestif, as well as a remedy for diarrhea or abdominal pain.

If you’ve cooked with them, please send me your recipes. Thank you!


BEST BAKING HACK EVER.

Trust me.

This is SO easy. And SO awesome.

For realsies. This could be the BEST tip I’ve ever shared.

Did I conjure this up myself? I’m not 100% sure…but it’s too good to keep secret.

OK, say you’ve made a batch of Brownies (recipe below) or a One-Bowl Chocolate Cake or even an Hot Milk Sponge Cake (super light and fluffy).

Would you LOVE to drench your creation in a dreamy, creamy, fudge ganache?

Don’t have the time to make frosting from scratch? Or you’re out of powdered sugar? Don’t want to resort to that chemically-laden and overly processed frosting in a can?

No worries.

Here’s the ONLY ingredient you’ll need.

You probably have a package of semi-sweet chocolate morsels around, right? I mean, ‘cos who doesn’t, ya know what I’m sayin’?

SO AMAZING.

In one easy step, you’ll create a  to-die-for topping.

Ready? This is all there is to it…

bakinghack1

Photo by Enchanted Seashells, Confessions of a Tugboat Captain’s Wife

Take a handful of chocolate chips; I think this is about 1/2 cup.

Sprinkle the chips evenly over just-out-of-the-oven brownies (or cake).

Ya gotta do it while it’s hot enough to melt the chocolate. (See my special seashell table?I can make one for you, too!)

Simply take a butter knife or offset spatula and spread the melted chocolate chips gently over the top.

Look how glossy and shiny and YUMMY chocolaty good that looks.

bakinghack2

Photo by Enchanted Seashells, Confessions of a Tugboat Captain’s Wife

DELICIOUS-ness. Guaranteed.

A no-brainer, it’s a success EVERY time.

bakinghack3

Photo by Enchanted Seashells, Confessions of a Tugboat Captain’s Wife

It starts out soft and if you’re like me and store any leftovers in the refrigerator, the topping develops into a firm but not too hard coating that serves to protect and preserve each and every moist mouthful.

  • Works great on cookies, too.
  • I’ve never tried milk chocolate/mint chocolate/peanut butter chips, but I assume they’d be good; if you try them, let me know!

Here’s Princess Rosebud’s Brownie recipe. One bowl, super easy!

1/2 cup vegetable oil
1/2 cup brown sugar
1/2 white sugar
2 eggs
1 teaspoon vanilla
1 teaspoon cold coffee (I always use a bit of coffee with chocolate)
1/3 – 1/2 cup cocoa
1/2 cup flour
pinch salt
1/4 teaspoon baking powder
Option: 1/2 cup chopped nuts

Mix thoroughly oil, sugars, eggs, vanilla, coffee. Incorporate cocoa and mix well.
Add flour, salt, baking powder, and nuts, if desired. Stir together, but not too vigorously. Bake at 350 degrees for about 20-25 minutes just until the edges pull away from the pan. No one likes dry brownies!


Our lives begin to end the day we become silent about things that matter

This post really spoke to me and is a serious counterpoint to my silly post about my hub’s fake mistress!

crazytraintotinkytown's avatarCrazy Train To Tinky Town

Like many of you I have a love/hate relationship with Facebook.  Whilst, I think that it has certain advantages for keeping in touch with family & friends located in faraway places and as a writer it does have certain benefits but for many it’s a bit of a dual-edged sword. Too often I have come across inappropriate posts and videos which in my opinion have no place on a social networking site. It is alleged that this week Facebook have failed to remove a video of a helpless & vulnerable kitten being deliberately doused in fuel and set alight; what purpose does that video serve? I also fail to see why you would want to give the sociopaths that committed this heinous and cowardly act their fifteen minutes of fame. Furthermore, you have to ask yourself why certain Facebookers would feel the need to “like” this type of posts. Whilst…

View original post 280 more words

YUMMY Old Fashioned ORANGE Meringue Pie

Sometimes it satisfies a certain nostalgia to crack open my mom’s old Betty Crocker Cookbook and recreate her tried and true favorite recipes.

They may not be TOTALLY the most UBER healthy…but once in while it’s OK to indulge.

This time I had a hankering for an Orange Meringue Pie…a bit of a change from the standard lemon meringue — not that lemons aren’t delicious — but I had a few organic oranges around and wanted to work with that specific and intensely ORANGE flavor.

I served it after a dinner of Chile Rellenos with Guacamole. The citrus was the PERFECT finishing touch to a spicy meal.

First of all, I’m going to be a bossy pants and insist that you spend just a few minutes to create your own baked pie crust. It’s not THAT difficult and is SO much better than store bought. (Recipe below)

orangepie4

Old school juicer. VERY low tech.orangepie1 Work it, work it! Don’t leave it for a minute, keep stirring, continue whisking…orangepie2 …until the mixture thickens and become silky, smooth, and emanates an amazing orange perfume.orangepie3

As soon as the filling is done, quickly turn to your mixer and whip the whites into light peaks of pillowy soft clouds.orangepie5Very stiff peaks is what you’re looking to achieve.
orangepie6

The last few steps are the MOST important. Fill the baked pie shell with the orange filling.
orangepie7 Spread the uncooked meringue over the filling, spreading to completely cover the pie. orangepie8Slide gently into the oven for about five to seven minutes. DON’T leave the kitchen ‘cos a minute too long and your meringue goes from luscious lightly browned goodness to crispy burned in a HEARTBEAT.

LOVELY. Very marshmallow-y.
orangepie9 BEYOND GOOD.

HONEST. 🙂orangepie10

Orange Meringue Pie (thank you, Betty Crocker!)

  • 1 (9 inch) pie crusts, baked
  • cup sugar
  • tablespoons cornstarch
  • egg yolks, slightly beaten
  • cup orange juice
  • 1/2 cup water
  • tablespoons butter
  • tablespoon lemon juice
  • tablespoon orange zest
  • 1 -3 egg white, meringue

Directions:

  1. Preheat oven to 400°.
  2. In saucepan combine sugar and cornstarch.
  3. Combine egg yolks, orange juice and water; stir gradually into sugar/cornstarch mixture in the pan.
  4. Cook stirring constantly over medium heat until mixture thickens and boils.
  5. Boil 1 minute, stirring constantly; stir in butter, lemon juice and the peel.
  6. Immediately pour into pre-baked pie shell.
  7. Cover completely with meringue-carefully sealing to the edges.
  8. Bake about 10 minutes or until meringue browns lightly.
  9. Cool on wire rack out of drafts.

BAKED PIE CRUST
1 cup all purpose flour
1/2 teaspoon salt
1/3 cup shortening
2-3 tablespoons cold water

Directions

Heat oven to 475ºF. Mix flour and salt in medium bowl. Cut in shortening, using pastry blender (or pulling 2 table knives through ingredients in opposite directions), until particles are size of small peas. Sprinkle with cold water, 1 tablespoon at a time, tossing with fork until all flour is moistened and pastry almost leaves side of bowl (1 to 2 teaspoons more water can be added if necessary).

Gather pastry into a ball. Shape into flattened round on lightly floured surface. Wrap flattened round of pastry in plastic wrap and refrigerate about 45 minutes or until dough is firm and cold, yet pliable. This allows the shortening to become slightly firm, which helps make the baked pastry more flaky. If refrigerated longer, let pastry soften slightly before rolling.

Roll pastry, using floured rolling pin, into circle 2 inches larger than upside-down 9-inch glass pie plate. Fold pastry into fourths; place in pie plate. Unfold and ease into plate, pressing firmly against bottom and side.

Trim overhanging edge of pastry 1 inch from rim of pie plate. Fold and roll pastry under, even with plate; flute as desired. Prick bottom and side of pastry thoroughly with fork. Bake 8 to 10 minutes or until light brown; cool on wire rack.