My First Camera #TBT #Throwback Thursday #Photography

Circa 1962. My first camera, a Kodak Brownie Holiday Flash. 

oldcamera2

Old school, in black and white,
oldcamera1


This beautiful camera was designed by Arthur H. Crapsey, the designer of other popular Kodak cameras.

Snapped with a Canon Rebel T3i.

DELICIOUS Sweet and Savory Vegan Holiday Recipes with Food For Life Bread

When Food for Life sent me a box of assorted breads to sample and review, I couldn’t wait to begin to experiment with recipes for Thanksgiving.

We are thankful to enjoy a meat-free, cruelty-free Thanksgiving dinner.

We LOVE bread and as tasty as these breads are on their own — stand alone goodness — I wanted to craft a few recipes and share them with anyone looking to eat healthier and of course, vegan.

These breads are gluten free, vegan, and USDA certified organic.

My family especially enjoys the bread toasted, which brings out all of the unique flavors. They are amazing simply with hummus or in veggie sandwiches.

For holiday baking ideas, here’s one dessert bread pudding, one savory bread pudding, and my version of a vegan stuffing.


1. Vegan Bread Pudding (Sweet)breadpudding1

*****This is a MUST for you to make. It’s so unbelievably good, I ate the biggest bowl as soon as it came out of the oven. OK, to be honest, I ate TWO bowls. (That’s like half a loaf of bread haha). It was even better than I had anticipated.

The blueberries and apples are key to the whole moist yumminess and the slight toasty crunch of coconut is amazing. Next time I’ll add a tablespoon of orange zest to brighten the fruity flavors.

Ingredients:

One loaf Food for Life Sprouted For Life Bread Gluten Free Cinnamon Raisin with sprouted chia, quinoa, and millet. (The Almond version would be awesome, too.)
2-3 cups plain or vanilla almond milk, really SOAK the bread
1/2 cup brown sugar
3 tablespoons pure maple syrup
1 teaspoon vanilla
1/4 cup raisins
1/4 cup dried blueberries
One apple, peeled, diced
Ground cinnamon
Toasted coconut for topping 

breadpudding2Instructions:

  1. Preheat oven to 350° degrees. Grease a nine-inch baking dish or casserole dish.
  2. Tear the bread into rough cubes.
  3. In a large bowl, whisk together milk, cinnamon, sugar, maple syrup, and vanilla. Add the bread, let sit about 10-20 minutes, or until bread is soft and has absorbed most of the milk. Add the raisins gently mix. Don’t over mix.
  4. Scoop into prepared pan.
  5. Lightly sprinkle top with a little more cinnamon and the coconut.
  6. Bake 30-45 minutes until all the liquid has been absorbed and it’s a puffy golden brown.

YUM! Just TRY to stop eating it.
I think it’d also be awesome with your favorite sauce
or a 
scoop of vegan ice cream.
breadpudding3


I don’t have pics of the next two because I didn’t want to prepare them too far in advance, but I wanted to share the recipes so you’ll all have enough time to shop for the ingredients.

2. Vegan Bread Pudding (Savory)

Ingredients:

One loaf  Food for Life Sprouted For Life Bread Gluten Free (Flax Seed is the one I’ll be using.)
1 bunch Swiss chard, kale, or spinach (about 1 lb.)
1 cup almond or soy or rice milk
1 cup vegetable broth (low sodium)
2 teaspoons Dijon mustard
1 teaspoon salt
3/4 teaspoon pepper
1/4 teaspoon red pepper flakes
3 cups cubed bread
8 ounces sliced fresh mushrooms
1 red bell pepper, chopped
1 small onion, chopped
1 tablespoon minced garlic
2 tablespoons olive oil
Sliced tomatoes
Option: Add tofu cubes

Directions:

1. Preheat oven to 350°. Remove and discard ribs from Swiss chard or kale. Rinse with cold water; drain and coarsely chop. If using spinach, wash and chop.
2. Whisk together milk, broth, salt, pepper, red pepper flakes. Stir in bread.
3. Sauté mushrooms, onions, garlic, red pepper in hot oil until tender and soft. Stir in chard, kale, or spinach, and sauté 2 minutes. Fold vegetable mixture into liquid/bread mixture.
4. Top with thinly sliced tomatoes.If you have a vegan cheese that you like, crumble a few slices on top of tomatoes.
5. Pour into a lightly greased 11- x 7-inch baking dish. Bake at 350° for 35 to 40 minutes or until center is set. Let stand 5 minutes.


Vegan Stuffing (Dressing)

Yummy to stuff green or red peppers or baked butternut squash, halved. I serve with my homemade cranberry sauce. No one misses the meat and if they do, they know better than to mention it! This recipe makes enough to feed our family and have leftovers the next day.

2 medium onions, diced
6 stalks celery with leaves, diced
4 carrots, diced
6 cloves garlic, chopped
Two loaves of Original Three Seed Sprouted for Life Food for Life
1/3 cup fresh parsley, chopped
1 teaspoon celery salt
1 teaspoon dried sage, crumbled
1 teaspoon dried rosemary, crushed
1/2 teaspoon dried thyme, crumbled
1/2 – 3/4  teaspoon freshly ground black pepper
1 1/4 cups hot Homemade Vegetable Stock or a good quality low sodium purchased veg stock

Directions:
1. Saute onion, carrots, and celery, stirring occasionally until soft, 15 to 20 minutes. (Vegetables can be prepared up to 1 day ahead and refrigerated. Reheat before continuing.)
2. Transfer to large bowl and add stuffing cubes, parsley, celery salt, sage, rosemary, thyme, salt, and pepper. Stir in 1 1/4 cups hot stock.
3. If stuffing peppers or other vegetables, stuff lightly and bake for about 30-40 minutes.
4. If baking entire recipe as side dish: Preheat oven to 350°F and grease 3-quart casserole or 9- by 13-inch baking dish. Transfer stuffing to dish and drizzle with 1/2 cup hot stock. Cover with aluminum foil and bake until heated through, about 30 minutes. Uncover and bake until top is slightly crisp and golden, about 10 minutes longer. Serve immediately.

Of course you can add or detract any vegetables your family doesn’t like (our DIL doesn’t like mushrooms so I’ll make a small batch for her without them) and add more herbs and spices depending upon your own personal tastes. We like it rather peppery with bold flavors since it’s more than just a side dish.

Bon appétit!

I received product for sample and review, no other compensation. My opinions are my own.
http://www.foodforlife.com/

Hike to Glen Canyon Park in San Francisco

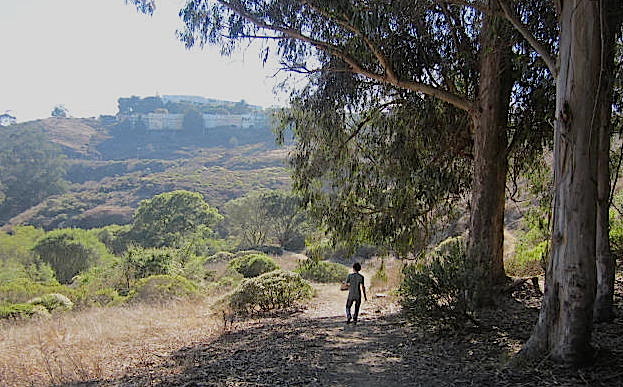
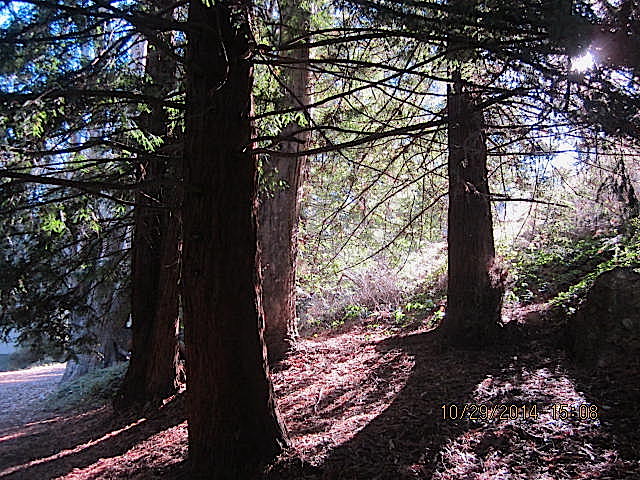
A few weeks ago I visited Professor Angel Boy and DIL in SF. While DIL was at work, my son and I walked to Glen Canyon Park (or Glen Park Canyon) from their home.

Who knew this deep pocket of wilderness is steps away from high density living in the middle of the city?

Everything is either UP or DOWN. It was quite a strenuous workout, especially since I had to keep up with my six-foot-plus son.

We were looking for the coyotes that live in the canyon. My son saw one recently on a previous visit and we hoped to see him or her again, but we had no luck.

glencanyon18Lots of raspberries.glencanyon1 glencanyon2 glencanyon3 Twin Peaks.glencanyon4Angel Boy is always lightyears ahead of me.
glencanyon5 glencanyon6 glencanyon7 glencanyon8 glencanyon9 glencanyon19glencanyon10glencanyon17

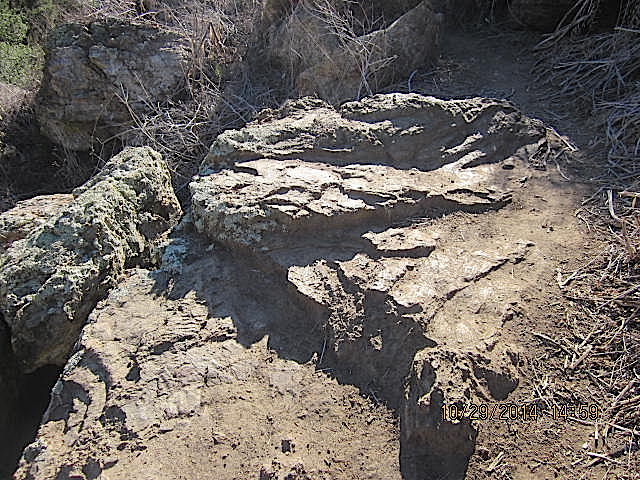
glencanyon11 glencanyon12 glencanyon13The free flowing Islais Creek.glencanyon20Islais Creekglencanyon14 It was a little hazy in the afternoon. I hadn’t traveled with my good Canon — pics were taken with Canon point and shoot. glencanyon15 Finally, he turned around. You can tell he’s saying, “Hurry up, Mom, and stop taking so many pictures!”glencanyon16According to Wiki: The park and hollow offer an experience of San Francisco’s diverse terrains as they appeared before the intense development of the region in the late 19th and the 20th centuries. The park incorporates free-flowing Islais Creek and the associated riparian habitat, an extensive grassland with adjoining trees that supports breeding pairs of red-tailed hawks and great horned owls, striking rock outcrops, and arid patches covered by “coastal scrub” plant communities. In all, about 63 acres (25 ha) of the park and hollow are designated as undeveloped Natural Area. Elevations in Glen Canyon Park range from approximately 225 feet (69 m) above sea level at the south end of the park to 575 feet (175 m) above sea level at the north end and along the east rim of the canyon; the walls of the canyon are extremely steep, with many slopes approaching a length-to-height ratio of 1:1

Raspberry and Chocolate Bars. YUM.

Rah Rah Raspberry Chocolate Layered Oat Bars
raspberrychocbar4Tugboat man and I stopped at a Boudin Bakery located in South Coast Plaza ‘cos he was famished — he doesn’t have the same kind of stamina that I’m blessed with — to keep going until that holy grail has been attained.

Of course I’m speaking of shopping.

We took a five minute break so the whingy one could have some sustenance  – a little snack, a boost of energy — just enough to walk around the mall one more time.

Christian Louboutin, Jimmy Choo, Hermes, Chanel.

(Poor guy. He’s so sweet, He suffers for me, he really does.)

We shared a Raspberry Chocolate Bar that was SO unexpectedly mouthwatering I couldn’t wait to attempt a recreation.

It’s in the oven now. Tugboat man and I’ll have a taste comparison to see if it measures up.

OK, we patiently waited and enjoyed a square of my version of their Raspberry Chocolate Bar along with a cup of ginger tea.

The verdict? DELICIOUS, but not EXACTLY the same, yet so good, it doesn’t really matter.

In every bite there’s creamy rich chocolate along with the crunch of oats and zesty raspberry. SO GOOD. 

Try it!

(Next time I’ll use fresh raspberries or pure unsweetened jam to control the amount of sugar.  We felt this recipe was a bit TOO sweet but that only meant we couldn’t have as large a piece as we wanted.)


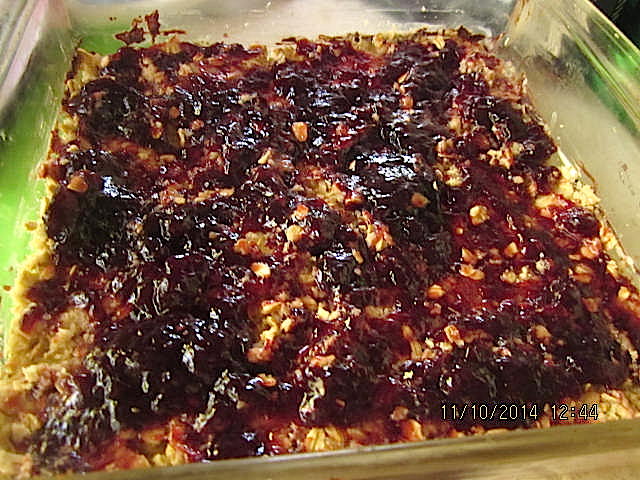
After firmly pressing bottom dough, spread with jam.

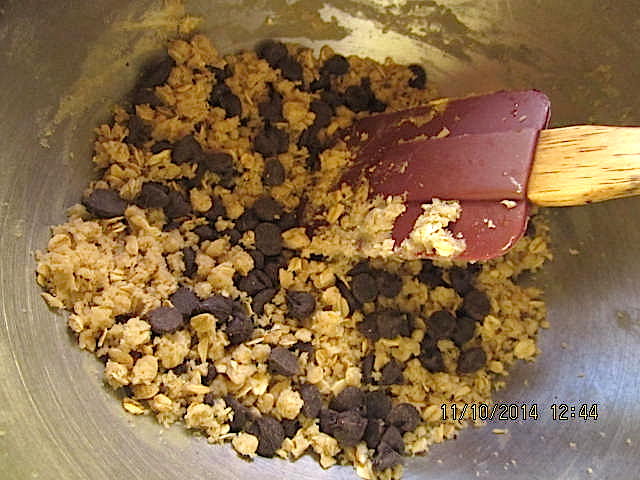
raspberrychocbarsAdd the chocolate chips, yum!
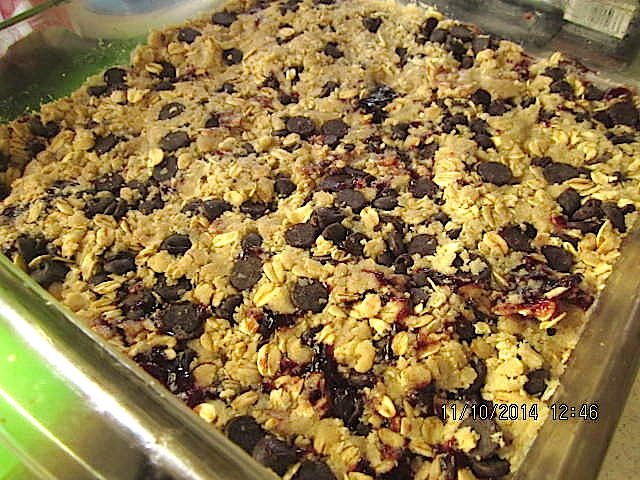
rasberrychocbars1Carefully press top dough over jam.
raspberrychocbar2Golden brown, it takes a long time to cool and firm up before cutting and eating. Be patient! Tip: Refrigerate to hasten setting up.raspberrychoc3

Chocolate Raspberry Layered Oat Bars

1 cup all-purpose flour
1 cup rolled oats
1/2 teaspoon baking soda
1/4 teaspoon salt
3/4 cup packed brown sugar
4 tablespoons butter, softened
2 tablespoons vegetable oil
1/3 to 1/2 cup semisweet chocolate chips
3/4 cup seedless raspberry jam

Preheat oven to 375°

In a medium bowl, combine sugar, butter, oil. Beat with a mixer at medium speed until smooth. Add flour, oats, salt, baking powder and stir until well blended (mixture will be slightly crumbly.).

Remove 3/4 cup of dough; toss with chocolate chips. Set aside.

Press the remaining dough firmly into an 8-inch square baking pan, and spread evenly with jam. Sprinkle with chocolate chip mixture and again press firmly.

Bake at 375° for thirty minutes or until golden brown. Cool completely on a wire rack before cutting into squares.


Picture of a Rose

Is there anything more perfect than a perfect rose?roseCanon Rebel T3i
1/100  5.6

Ultimate Smoothie Recipe

Yup, another smoothie recipe.

Don’t HATE.
Don’t say YUCK.
Don’t roll your eyes at me.
TRY IT!

smallsmoothieI’ve  been torturing my family for years, forcing them to drink the sometimes often dreadful concoctions that I formulate from a deranged aggregate of ingredients — adding a little of this and a little of that — sometimes palatable, sometimes not.

While the raw Cauliflower-Brussel Sprouts Smoothie was NOT a winner, I think I’ve finally developed the perfectly Ultimate Smoothie.

  • Tastes delicious
  • Nutritious
  • Helps with digestive/gall bladder issues (me)
  • Provides lots of energy

Ingredients:

  • Garden of Life Raw Protein Powder in Vanilla, Vanilla Chai, Chocolate, or Marley Coffee
  • Slippery Elm powder, great for digestion
  • Flaxseed Meal, full of healthy fiber
  • Chia seeds
  • EmergenC, one or two packets
  • Beets, canned/unsalted or from my garden (good for gall bladder)
  • Garden of Life Perfect Food Raw Organic Wheat Grass Juice Powder
  • Garden of Life Perfect Food Raw Organic Powder
  • Juices:  A combo of Rio Red Grapefruit, Apple, Mango, Cranberry
  • Banana (one or two)
  • Any other fresh fruit, this time I used blueberries and pears, but anything you have is yummy —  from peaches to watermelon
  • Nonfat yogurt, regular or Greek for more protein or soy/hemp/almond milk for vegan.
  • Ginger (to taste, I use about an inch-peeled)
  • Turmeric powder…great anti-inflammatory (1 teaspoon)
  • Cinnamon (1 teaspoon)
  • Ginseng (I use Korean Ginseng tea granules)

Additions: I usually add a handful of kale, chard, spinach, parsley, mint…just about any greens, even dark leafy lettuce

I throw it all in the blender and process until very smooth. You’ll never taste the greens or the beets, but they add a bright undertone to the fruit.

If you have a lime or a lemon, add a squeeze or two. I have a friend who tosses in a whole orange, peel and all, from her own organically grown tree. I’ve never done that, but it’s certainly an option.

Whether you try my smoothie as a meal replacement (like I do) or as a healthy between-meal snack, my Ultimate Smoothie will provide added energy and lots of nutrition for your busy day.

P.S. Yes, I use a lot of ingredients, but it’s still easy to do and can be made anywhere if you have a blender or even an immersion blender.

Bon appétit!

I hate swallowing vitamins and supplements but the smooth and creamy texture of my ultimate smoothie helps them go down without gagging.

Since I’ve been taking Garden of Life Kind Organics supplements, I feel so good and it’s really helped with my digestive issues (and my son is a fan, too!) I’m a big believer in pre and pro-biotics, balancing intestinal flora and fauna, and you remember I’m a junkie for wheat grass!

Here’s what I take every day:
Garden of Life Primal Defense
Garden of Life Fungal Defense
Garden of Life RAW Enzymes Women
Garden of Life Kind Organics Women’s Multi 40+

My tugboat man and son have the same routine, but theirs is especially formulated for men.

Enloy and be HEALTHY!

A Secret Cathedral at the Grand Staircase-Escalante National Monument

We had one last detour before our final destination of the magnificent Zion National Park.

Our goal was to pack in as many sights as we could on our ten-day trip.

We were up early for a short hike to a lookout at Lake Powell.

Glen Canyon Dam.lakepowell

Lake Powell, with hardly any water in the middle of this drought.lakepowell3 Beautiful cliffs.lakepowell1

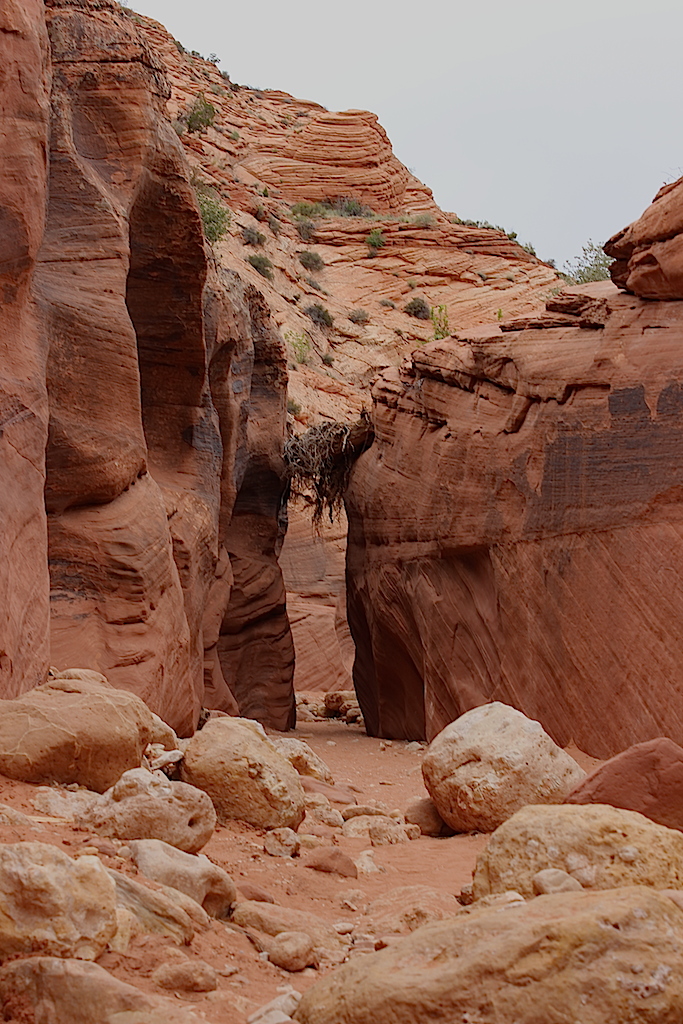
Back on the road, we turned off the main highway and set out on a dusty, bumpy, red-dirt path barely wide enough for one vehicle — more like a wagon train trail — several miles off the main road to a trailhead that would lead to an amazing slot canyon hike.

The Grand Staircase-Escalante National Monument, at 1.7 million acres, dominates southern Utah.

It’s unique in that it is the first monument to be administered by the Bureau of Land Management, rather than the National Park Service.

The Grand Staircase is a geological formation spanning eons of time and is a territory of multicolored cliffs, plateaus, mesas, buttes, pinnacles, slot canyons, and world-class paleontological sites..

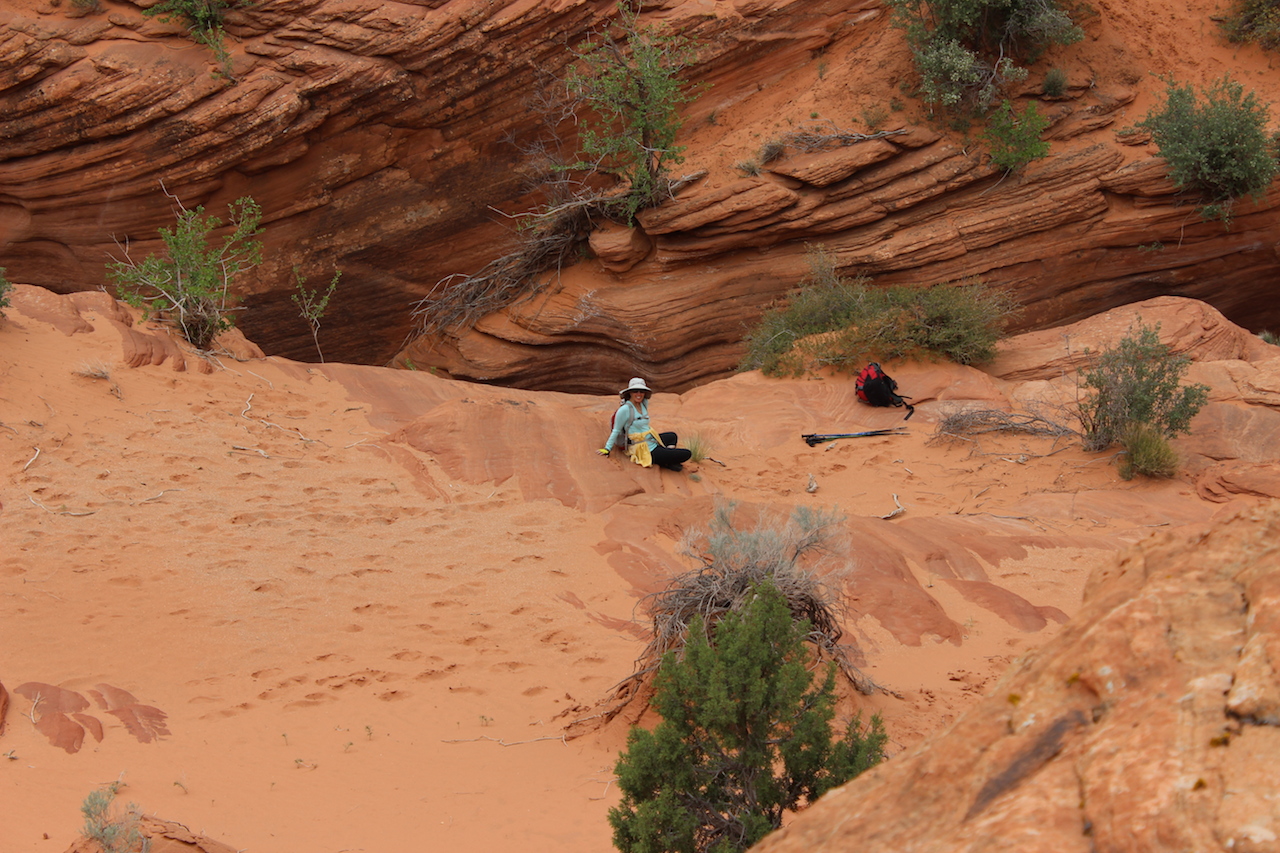
After hiking for about and hour or so, clambering up and out of narrow and shady slot canyons that seemed to go on forever, passing a random cow or two, the “cathedral” emerged in a open space bathed in sunlight.

It was really, really, really, REALLY special. Words can’t describe it and my pics don’t do justice to its beauty.vermillioncliffscathedral

I don’t know why it’s “secret” except that a couple of experienced hikers we chatted with at the trailhead shared a few of the highlights of the area and cautioned us not to be TOO specific when we talked about where we were to avoid it becoming overcrowded. vermillioncliffs vermillioncliffs1 vermillioncliffs2 Spectacular. WOW.vermillioncliffs4 This is supposed to be one of the longest slot canyon hikes in the country, if not THE longest. We hiked for about three hours in, a six-mile round trip.vermillioncliffs5 vermillioncliffs6 ME! vermillioncliffsme Vermillioncliffs10 Vermillioncliffs11 vermillioncliffs12

Next stop, ZION!

YUMMY Chocolate + Black Beans + Beets Brownies

plus

http-www-cocoavia-com

http-www-cocoavia-com

and

wikimedia.org/wikipedia/commons

wikimedia.org/wikipedia/commons

equals

chocolate cakeplate

Now, don’t you all go rolling your eyes at me.

I used to be a teacher and I still have eyes in the back of my head.

I can see you.

Before you make all those gaggy sounds and scrunch up your face (you know who I’m talking to!), I implore you to TRY these very tasty and UBER healthy brownies.

Well, not all that healthy ‘cos of the sugar and chocy chips, but cocoa beans grow on a tree, so that makes them a plant — therefore sort of a veggie or a fruit. So, healthy, right?

Don’t be all judge-y and shake your head.

TRY them for me, OK?

Black Bean + Beet Brownies

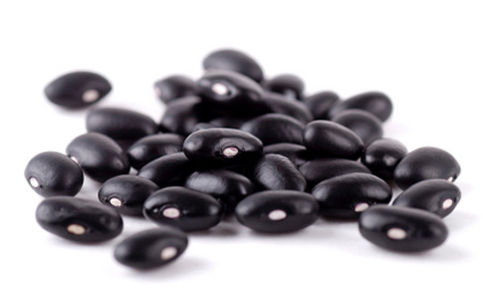
  • 1 can or 3/4 cup cooked black beans (unsalted or rinse well)
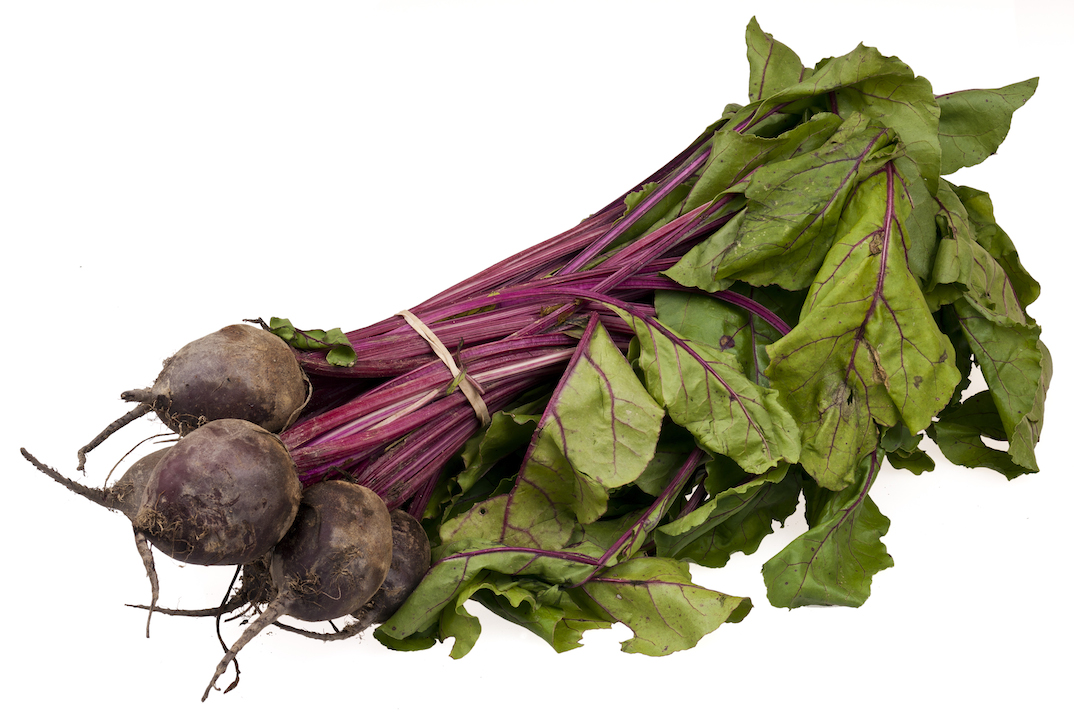
  • 2 tablespoons – 1/4 cup unsalted cooked beets or finely shredded raw beets (Yes, BEETS!)
  • 1/2 cup vegetable oil, or olive oil(I always use a bit less)
  • 2 eggs *see below for vegan substitution*
  • 1/2 cup unsweetened cocoa powder
  • 2/3 cup sugar ( I’ve tried brown sugar and I’ve tried agave, not sure what’s better, kind of a personal taste thing)
  • 1 teaspoon instant coffee or espresso or leftover cold coffee
  • 1 teaspoon vanilla extract
  • 1/2 cup mini chocolate chips, divided
  • 1/3 cup flour
  • 1/2 teaspoon baking powder
  • 1/2 teaspoon salt

Top with Best Baking Hack Ever frosting (click for recipe)

Directions

Preheat the oven to 350 degrees F. Grease a 9 by 9-inch square baking pan. In a blender or food processor, puree the beans and beets with the oil. Add the eggs, cocoa, sugar, coffee, and vanilla. Melt half the chocolate chips and add to the blender. Blend on medium-high until smooth. In a small bowl, whisk together the flour, baking powder, and salt. Add to the blender and pulse until just incorporated. Stir in the remaining chocolate. Pour into the prepared pan. Bake until the surface looks somewhat matte around the edges and still a bit shiny in the middle, about 20 minutes. Let cool at least fifteen minutes before eating. My family thinks they taste better the longer they sit in order for any “beany” texture to dissipate.

Best Baking Hack Ever

bakinghack1 bakinghack2 bakinghack3


Wanna go vegan? 

  • 1 Tbsp. Chia Seeds
  • 3 Tbsp. Water

With food processor, spice grinder, or old school mortar and pestle, grind the chia seeds into a meal. Mix the water and ground chia seed meal in a small bowl. Allow to sit for 5 minutes or so, or until it takes on a gloppy texture similar to raw egg yolk.

Drops and Drips: Water

Water is essewaterbottlesntial for life.

We all know this; we all carry disposable or reusable bottles of water —  water is a billion dollar industry.

Here in California, the drought is so extensive that restaurants don’t automatically serve water; you have to request it.

There are voluntary water restrictions for lawns and gardens.

Yet there’s water all around us if we only LOOK.

Wasted water.

Dishwashing water, washing machine water; water swirling around our feet in the shower  —  all lost down the drain.

It really frustrates me that there isn’t a easy way to reclaim this “gray water”.

My tugboat man and I are committed to leaving as small a footprint as possible and to be good stewards of this world, yet even for my guy who has a degree in nautical engineering, figuring out how to make a gray water system in our home is not as easy as I assumed.

Our challenge is a tri-level home with the laundry room on the third floor — apparently you can’t just stick a hose out the window — according to hub, it’s more complicated than that.

We, but I really mean HE is designing a functional system, but every single time I see a drop of water down the drain instead of being diverted to the garden, I get very sad!

To honor precious water and its importance to our bodies, check out this series of photos I took at my photography class.

I haven’t liked doing anything this much since I discovered the magic of that little plastic card that meant all the pretty treasures could come home with me!

My son reminded me of our kitty, Bandit, who loved to sit in the sink and drink dripping water. Still miss her so much…

waterdrip6 waterdrip5 waterdrip4waterdrip3waterdrip2Part One, October theme, Healthy Living


BEST BAKING HACK EVER.

Trust me.

This is SO easy. And SO awesome.

For realsies. This could be the BEST tip I’ve ever shared.

Did I conjure this up myself? I’m not 100% sure…but it’s too good to keep secret.

OK, say you’ve made a batch of Brownies (recipe below) or a One-Bowl Chocolate Cake or even an Hot Milk Sponge Cake (super light and fluffy).

Would you LOVE to drench your creation in a dreamy, creamy, fudge ganache?

Don’t have the time to make frosting from scratch? Or you’re out of powdered sugar? Don’t want to resort to that chemically-laden and overly processed frosting in a can?

No worries.

Here’s the ONLY ingredient you’ll need.

You probably have a package of semi-sweet chocolate morsels around, right? I mean, ‘cos who doesn’t, ya know what I’m sayin’?

SO AMAZING.

In one easy step, you’ll create a  to-die-for topping.

Ready? This is all there is to it…

bakinghack1

Photo by Enchanted Seashells, Confessions of a Tugboat Captain’s Wife

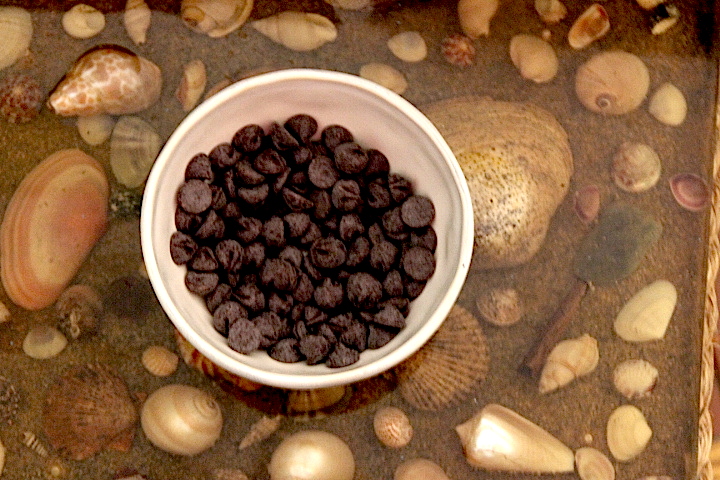
Take a handful of chocolate chips; I think this is about 1/2 cup.

Sprinkle the chips evenly over just-out-of-the-oven brownies (or cake).

Ya gotta do it while it’s hot enough to melt the chocolate. (See my special seashell table?I can make one for you, too!)

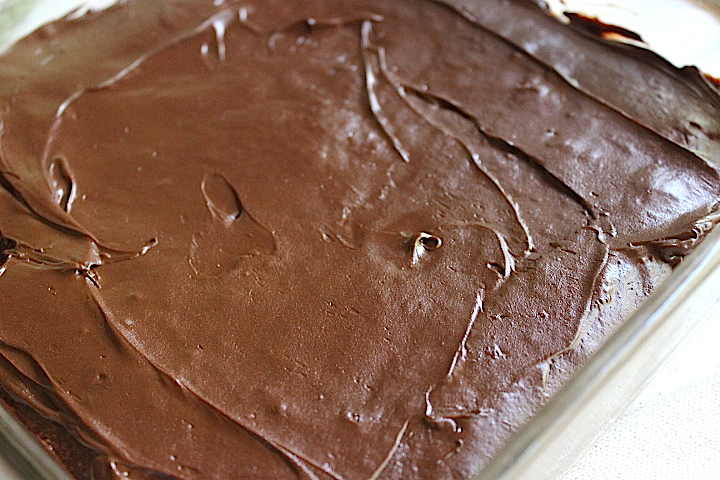
Simply take a butter knife or offset spatula and spread the melted chocolate chips gently over the top.

Look how glossy and shiny and YUMMY chocolaty good that looks.

bakinghack2

Photo by Enchanted Seashells, Confessions of a Tugboat Captain’s Wife

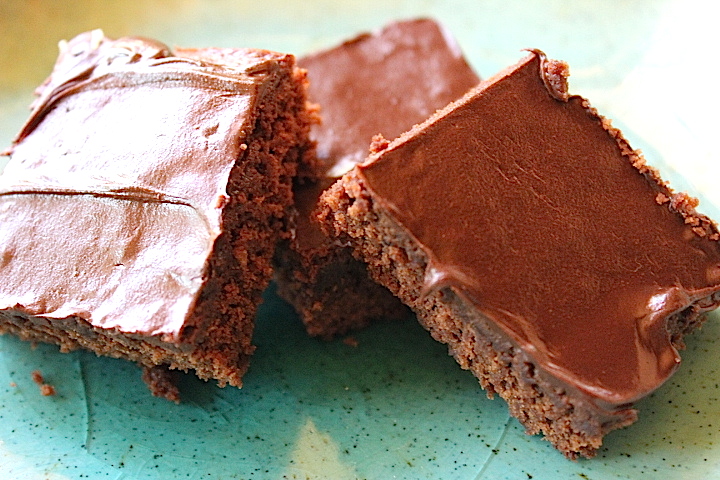
DELICIOUS-ness. Guaranteed.

A no-brainer, it’s a success EVERY time.

bakinghack3

Photo by Enchanted Seashells, Confessions of a Tugboat Captain’s Wife

It starts out soft and if you’re like me and store any leftovers in the refrigerator, the topping develops into a firm but not too hard coating that serves to protect and preserve each and every moist mouthful.

  • Works great on cookies, too.
  • I’ve never tried milk chocolate/mint chocolate/peanut butter chips, but I assume they’d be good; if you try them, let me know!

Here’s Princess Rosebud’s Brownie recipe. One bowl, super easy!

1/2 cup vegetable oil
1/2 cup brown sugar
1/2 white sugar
2 eggs
1 teaspoon vanilla
1 teaspoon cold coffee (I always use a bit of coffee with chocolate)
1/3 – 1/2 cup cocoa
1/2 cup flour
pinch salt
1/4 teaspoon baking powder
Option: 1/2 cup chopped nuts

Mix thoroughly oil, sugars, eggs, vanilla, coffee. Incorporate cocoa and mix well.
Add flour, salt, baking powder, and nuts, if desired. Stir together, but not too vigorously. Bake at 350 degrees for about 20-25 minutes just until the edges pull away from the pan. No one likes dry brownies!